It’s May! Gardening season is in full swing this month. And whether you have purchased seedlings or started them from seed, you will need to transplant them this month. Here are a few tips for transplanting success.
Photography by Joy Yagid, unless otherwise noted.
1. Research, research, research.
You’ll want to learn as much about the plant as possible. Research its soil needs and preferences. It’s almost always a good idea to amend the soil prior to transplanting. Know which ones are frost-tolerant and which ones can’t tolerate a late spring cold snap. Keep an eye on the extended forecast and make sure it is favorable for your plants before planting them. This includes rain and wind. Seedlings don’t have an extensive root system, so the lack of rain or too much wind can be detrimental.
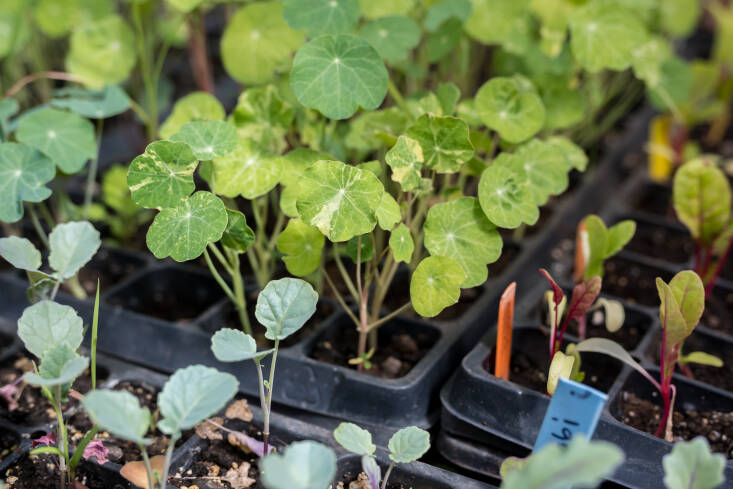
2. Harden off your seedlings.
This usually takes one or two weeks, so plan ahead. Hardening off is the gradual acclimatization to the outside world, namely to the sun but also to the wind. Start by moving the potted plants outside in the shade and gradually increasing the amount of sun over the week or two. Bring them in at night if the temperatures drop too low. If you see your plants’ leaves are getting burnt leaves or dropping, move them back to the shade and restart the process.
3. Pick the right day to transplant.
A cloudy cool day is best to reduce transplant shock. If you don’t have the option for a cool and cloudy day, second best is later in the day, when temperatures are cooler and the sun is less intense. Extra credit if rain is in the forecast for the next day. Water well if there’s no rain in the forecast.
4. Choose the strongest seedlings.
Thin out all but the strongest, largest seedlings. Make sure your seedling has at least two true leaves, and more may be better. Not sure what this means? The first two leaves are called cotyledons. They do not look like the adult plant’s leaves. The next set of leaves are true leaves and look like smaller versions of the plant’s adult leaves.
5. Prep the site.
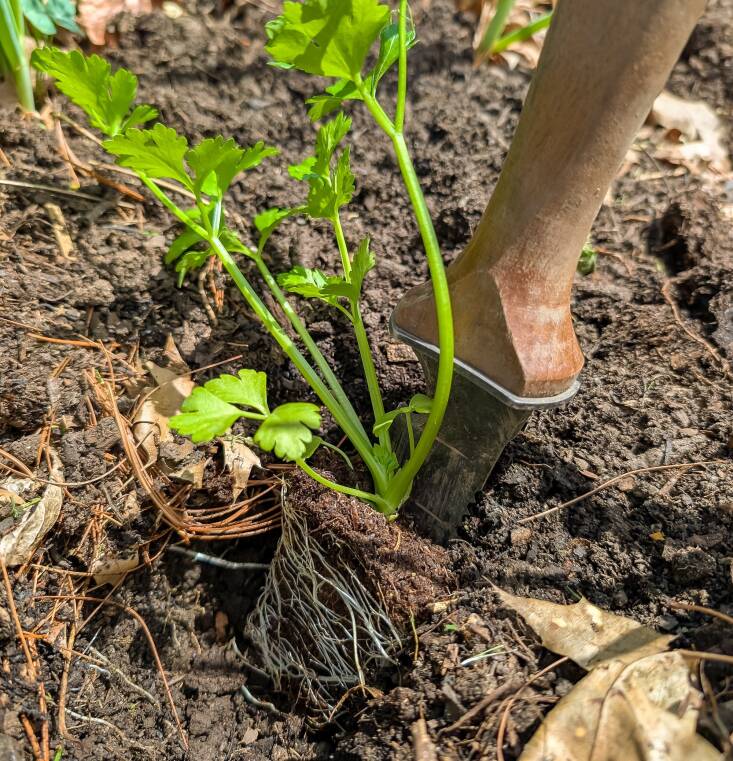
Make the hole deep enough so that the seeding will sit at the same soil level. The exception for this rule is tomatoes: You can bury tomatoes deeper since they will sprout new roots along the buried stem, leading to a stronger root system. (Note: For grafted tomatoes, you never bury the graft; otherwise the entire plant can fail.) Amend the soil if planting in a bed.
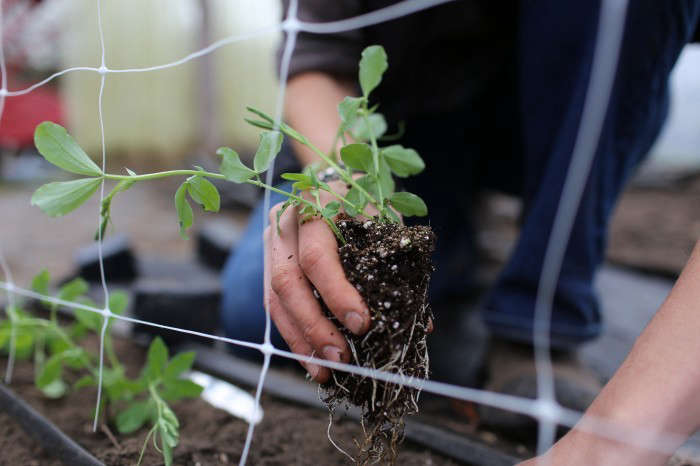
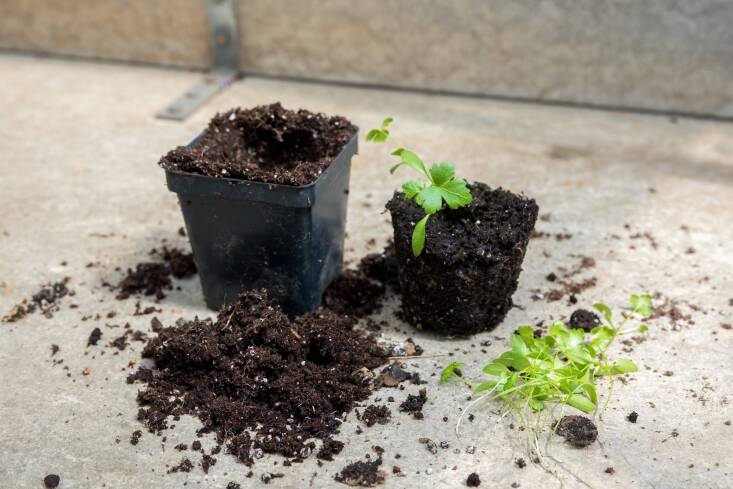
6. Transplant.
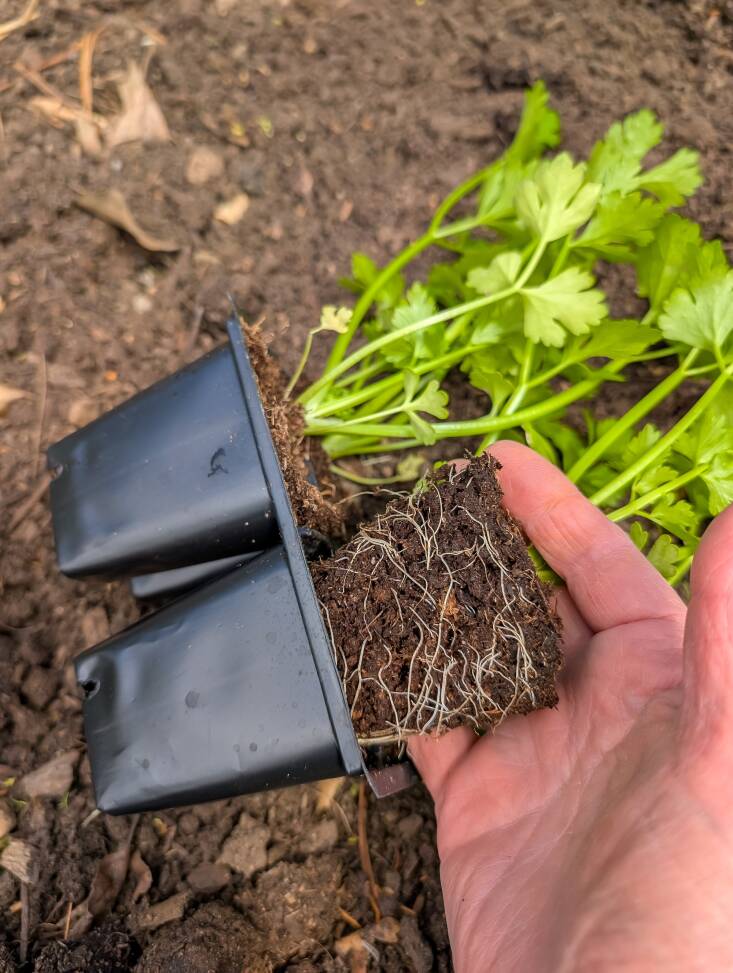
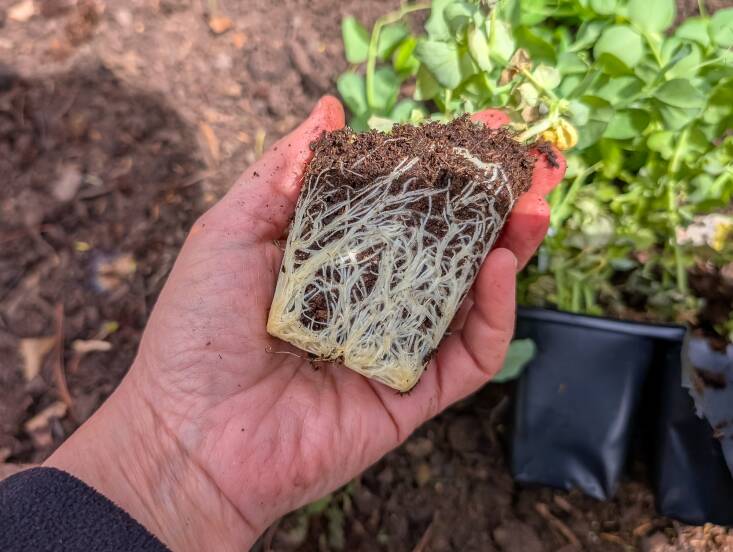
The primary objective is to avoid transplant shock. Water well before starting. Disturb the roots as little as possible. Handle the plant gently. Do not remove the plant by pulling it out of the pot. Place your hand on the soil with your fingers spread out around the stem(s). Turn the pot upside down and tap until you can lift the pot off. For larger pots, lay the pot on its side and tap the sides until the plant is loose enough to slide out, and pull the pot away from the plant. If you use transplantable fiber-based pots, you may want to remove them. My experience is that they don’t break down as fast as needed.
7. You’re not done.
It takes a while for the seedling to adjust to its new in-ground home. And even if you were very careful, transplant shock (damage to the roots, which compromises the plant’s ability to take up water and nutrients) can still happen. Water the plant as needed, but do not over- or under-water. No sopping wet soil and no dried-out soil. If the plant was not properly hardened off and you see scorching on the leaves, provide temporary shade. Fertilize as needed. Follow the package directions exactly.
See also:
- Everything You Need To Know About Transplanting Plants
- Secrets of an English Head Gardener: How to Transplant Shrubs and Perennials
- Time to Thin Out the Garden? How to Divide (and Multiply) Popular Perennials


Have a Question or Comment About This Post?
Join the conversation