Okay, so you have a garden filled with plants. This is obviously excellent. But maybe (and this is the nature of a garden) some of your flowery friends aren’t in the right spot and would look prettier and thrive somewhere else in your garden. Or, perhaps you learned that some of your plants are verging on expiring and desperately need to be divided and transplanted.
One of the first lessons I learned from my gardening dad was how to divide and transplant bearded iris. Unfortunately, his method was more—how do I say it politely?—carefree than most. He would viciously stab apart the fleshy rhizomes with a shovel, tear apart the clumps like a savage, and then “plant” (read: chuck) the iris corms over his shoulder into the garden and hope for the best. FYI: This is not how to properly divide and transplant.
Below, the right way to do it:
1. What is transplanting anyway?
Transplanting—or replanting—is an important event in a plant’s life, sort of like moving to a new house, where a plant is unearthed and either divided or moved as a whole to a new location.
2. Why transplant plants at all?

Some plants need transplanting to rebloom. Plants like daylilies, hostas, peonies, and bearded iris need to be divided, and therefore, transplanted. Not every year is needed, probably every third year. These plants may take awhile to re-establish themselves, but they need to be rejuvenated this way.
Another reason to transplant: it helps spread the wealth. Maybe you notice that a ground cover is spreading superbly in your garden and you want to have more of it for across the path for continuity. By dividing up some of the existing clump and then transplanting them, you have instantly made more of a good thing. It’s kind of like grocery shopping in your own garden. You can look for what is thriving and decide if you can divide it and then transplant it.
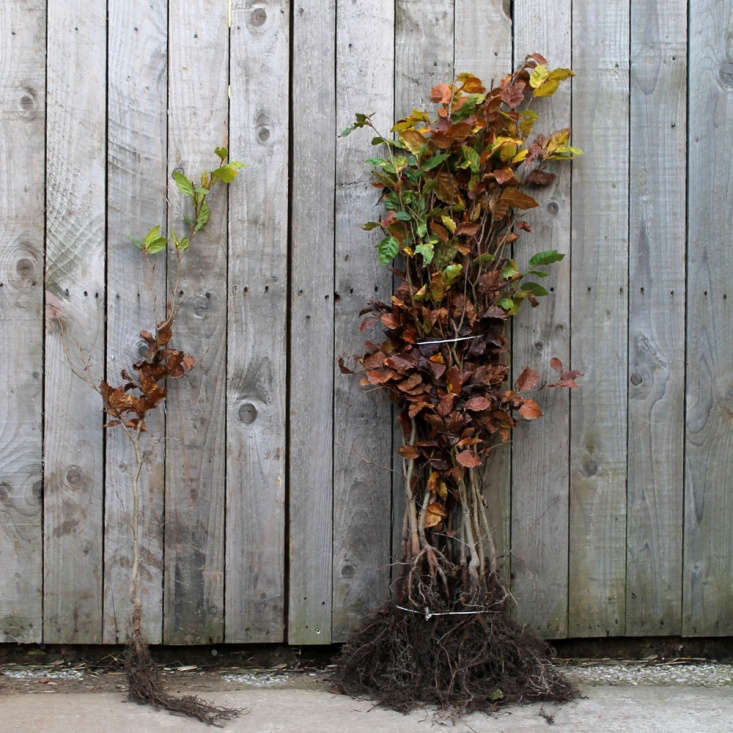
Tip: To divide a plant, you don’t need a fancy tool. An old serrated knife can properly cut apart root systems. Just dig up the entire plant and then divide it up, making sure you rescue enough of the root system. Then re-plant.
3. When is a good time to transplant?
Timing is everything. As a general rule, and for the greatest success, transplant your plant before it flowers. If your plant blooms in spring, then you want to make your move early, way before it showers itself with petals.
Or, wait a bit after it’s finished. If your early bloomer is very hardy, you can move it in the fall. For summer-blooming beauties, move them in the fall, too. Also to keep transplant shock to a minimum, choose the coolest part of the day, either early morning or late afternoon. Basically, the summer is the worst season to move plants.
4. What’s the proper technique for transplanting?

While every plant will require a slightly different method, here are the basics: First, mark where you want to move your plants. Then make sure the root ball of the plant you are moving is well watered. Next, dig a hole twice as wide as the root ball and at least as deep; this preserves as much of the root system as possible. Do not roughen up the sides of the root ball. Instead, make sure the sides of your planting hole are jagged so that roots penetrate easily. Now make a firm cone of soil in the center of the hole where you will set your root ball. Next step is to water the soil where your plant will go, carefully lower your plant into the hole and make sure it sits slightly above the soil line. Refill the hole with garden soil mixed with a rich planting mix and gently pat it down to settle your transplant into bed. Tip: You can also add a tablespoon of bone meal to the soil mix to encourage root growth. Last, water thoroughly.
5. Now what?
Make sure vulnerable, newly transplanted plants are watered daily, especially if the weather is warm. Also, trim back the plant a bit so it can focus on regrowing its roots. For perennials, trim back about one-third of the plant. And if you can provide a little shade for your plant patients, this is excellent too.
6. What if you’re transplanting a bunch of plants?
While it might be tempting to dig out every plant you want to move all at once, this is very damaging to roots as they will be exposed and can dry out quickly. Instead, dig up one plant at a time and transplant immediately, then move on to the next one.
7. What should you do if the transplant wilts?
Moving a plant can damage roots and strain the plant. Plants that droop after a transplant are suffering from minor transplant shock. Also, the plant may be dehydrated as the fine roots that absorb the bulk of the water are often damaged or destroyed when plants are disturbed. But don’t fret, they usually recover and perk up after a few days of water—unless, of course, they have been re-planted incorrectly or the plant was old, already diseased, or malnourished.
To help a transplant recover, try this trick: Make a weak sugary solution with plain sugar mixed with water and feed this to a plant after transplanting to help speed recovery time. This cocktail can also be used as a transplant shock preventer if applied at the time of transplanting.
For more gardening how-tos, see:
- Zero-Waste DIY: How to Grow Seedlings Using Newsprint
- Gardening 101: How to Use Coffee Grounds in the Garden
- Your First Garden: How to Start a Garden for Practically Free


Have a Question or Comment About This Post?
Join the conversation