Making your own wintertime corsage is less about having a particular way with plants and more about your tolerance for braving chilly temperatures to do your foraging. Inspired by Akiko Seki’s festive headgear, this week I bundled up and foraged for flower seed pods, curled-up fern spores, and the ghosts of garden coral bells.
Here’s how to make your own:
Photographs by Erin Boyle except where noted.

I wanted to make a corsage that included a range of colors and textures, so I only took a few clippings from each plant I encountered. Photograph by Akiko Seki.

I found that laying out my spoils helped me to see exactly what I had to work with and to try a few practice combinations before wiring the corsage together. My collection also included dried reeds and winter grasses.

In addition to my garden finds, I needed a good pair of scissors such as Tajika Flower Shears ($56 at Analogue Life) to take foraging. I also used thin wire like this spool of 16-Gauge Wire ($4.25 at Amazon), ribbon, and straight pins.

I started with the materials that I wanted to use for the back of my corsage. While I was building the corsage I left the stems and wire long so that I could easily grip the stems and so I could use the same bit of wire as I continued to add new materials. After every few stems that I added, I made another tight wrap with the wire.

To include smaller stemmed pieces, such as this London plane pod, I attached a bit of wire directly to the stem. Sometimes it’s easier to slip a piece of wire into a bundle than it is to incorporate a new stem.

As I added layers to my corsage, I thought about colors and textures. I placed the most visually appealing pieces, such as the seed pods, in the center and filled in empty spaces with a variety of more feathery grasses. Because I knew that I was going to cover my stems with ribbon, I didn’t worry too much about making my wire perfectly straight.
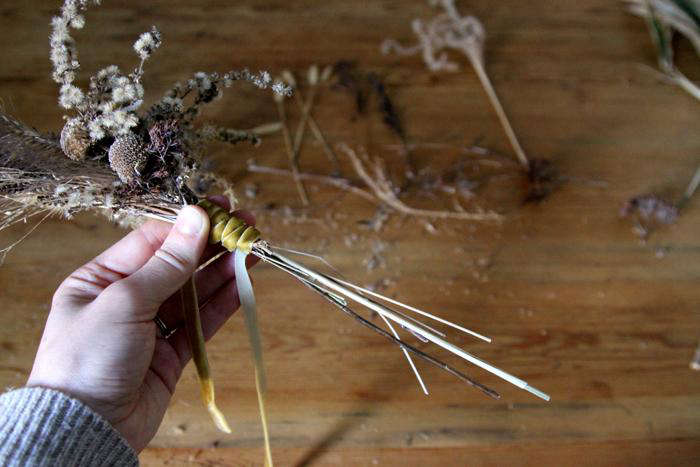
When I was ready to wrap my stems, I started close to the top and left a long tail of ribbon so that I’d be able to tie it after I’d finished the wrap. After the ribbon was secure, I trimmed the stems.

For this corsage, I chose a bit of ochre-colored velvet ribbon. I love how the color brings out the golden hues of the dried grasses and seed pods and the velvety texture is just right for winter. Looking for special ribbon? Shop for our favorite Ribbons.

And there you have it, a wintry corsage to make you feel fancy on even the chilliest day.
N.B.: This is an update of a post published January 21, 2013 as part of our Haberdashery week.
For more of Erin’s winter DIY projects, see DIY: Bottle-Fed Paperwhites and DIY: A Grapefruit Birdfeeder for Feathered Friends.


Have a Question or Comment About This Post?
Join the conversation