I’m a soil scientist and a former faculty instructor for Oregon State University’s Extension program, where I’ve taught and consulted with farmers and gardeners. My own half-acre garden in southern Oregon is my laboratory where I experiment to find new ways to improve the soil.
After spending years learning how to make garden soils light, fluffy, and easy to work, I wrote Building Soil: A Down-to-Earth Approach, a guide to everything you need to know to improve soil. Here are 10 of my top tips to improve soil:
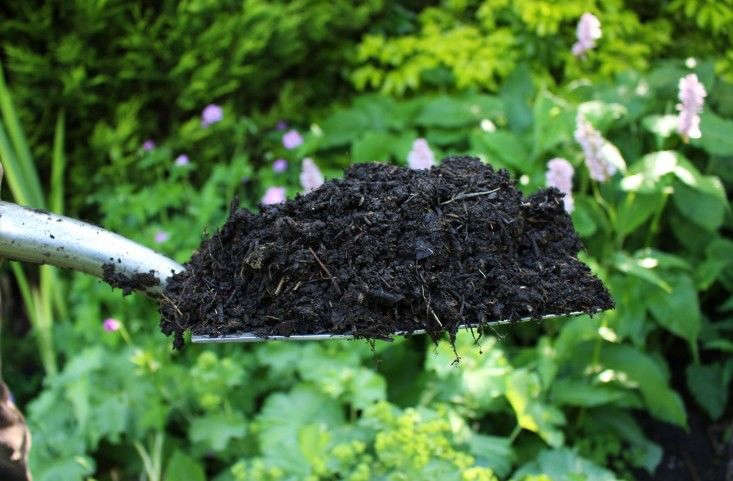
1. Feed it an Organic Diet

Spring brings a flurry of underground activity that we can’t see. Billions of soil organisms stretch and yawn, exploding into existence. It’s this living soil below ground that helps gardens thrive above ground by recycling nutrients, capturing water, improving soil tilth, and fighting pests and disease.
We build soil health all year-round by feeding and caring for it. How? Living soil has the same four basic requirements we do: food, water, shelter, and air.
Autumn is the best season to start. Organic materials, the key ingredients for healthy soils, abound. You can add fallen leaves, garden debris, kitchen scraps, and even apples raked from beneath fruit trees to soil.
Chop organic material directly into the top 2 inches of soil with a heavy bladed hoe and cover with mulch. Ideally, add concentrated manures, mineral phosphorous and potassium fertilizers, and lime at the same time. Adding these materials in the fall gives them time to break down for use when plants need them in the spring.
2. Till With Worms

Instead of breaking out the rototiller, or breaking my back double digging, I like to let the worms do my tilling for me by using sheet mulching techniques.
Sheet mulching is the process of building compost right on the soil surface. For new gardens, I’ll add a smothering bottom layer of cardboard to kill existing vegetation, then alternate 2- to 4-inch-inch thick green and brown compost layers. This invites worms to burrow through the soil as they transport food. In the process, they dramatically improve soil structure, while depositing power-packed worm manure castings.
Sheet mulching takes advance planning. Ideally, start sheet mulches for new gardens the year before you plan to plant (and for existing gardens a few months before planting). Sheet mulching will build new garden soil literally from the ground up. It maximizes nutrients, smothers weeds, and keeps soil life intact and undisturbed.
3. Grow Your Own Soil

Green manures and cover crops—such as buckwheat and phacelia in the summertime and vetch, daikon, and clovers in the fall—are my favorite way to improve soils. Whenever I have a window before planting, I grow a cover crop to add organic matter, lighten and loosen soil structure, and enrich garden nutrients. Cover crops also act as a living mulch to shelter soils and control weeds in the off-season.
Chop over-wintered cover crops directly into spring soils a few weeks before planting. During the growing season, sow a quick-growing cover crop, such as buckwheat, to fill the gap between spring and fall crops. When it’s time to plant, pull the buckwheat cover and use it as a mulch for fall garden beds.
4. Test for Success

Soil tests are an indispensable garden tool. I always recommend taking one when starting a new garden, or when garden health declines. If an essential nutrient is missing, garden and soil health will suffer. For best results, take nutrient tests in the late summer or early fall. Submit a soil test to a certified lab to add the right balance fertilizers and lime materials to new gardens. For a list of certified labs visit NAPT.
5. Supply What’s Missing

Over several seasons of soil building, a living, organic soil recycles and retains most nutrients, reducing or eliminating added fertilizer needs. When planting a new garden, however, organic fertilizers and lime ensure proper nutrition for the season ahead. If you’ve missed the fall window to add lime and mineral fertilizers, add them several weeks before planting in spring.
Use soil tests results and other resources to determine your garden’s fertilizer needs. For general purposes, purchase a complete organic fertilizer mix from your garden center and use as recommended. Scratch fertilizers into the top 2 inches of vegetable gardens. For perennial gardens, don’t dig at all. Spread fertilizers and lime, when needed, around the plants, water lightly, and cover with mulch.
6. Don’t Forget The Nitrogen

Of all the essential plant nutrients, nitrogen deserves special mention. Though a living soil will continue to recycle and retain most other mineral nutrients, nitrogen is often in short supply, even after years of soil building. Not only does nitrogen feed soil plants, it also feeds soil organisms. Because of this, garden growth and long-term soil health depend on nitrogen.
Before planting every year, ensure sufficient nitrogen by counting all the sources you’ve added. Organic fertilizers, such as blood, seed, or feather meal, are sources of concentrated nitrogen. Fall or spring legume cover crops transfer nitrogen from the atmosphere to the soil. Manures or green grass clippings, incorporated as amendments, provide nitrogen as well. Compost, on the other hand, does not supply enough garden nitrogen. While compost is great for improving overall soil health, additional nitrogen sources are needed when using compost as an amendment.
7. Pull, Cover, Smother

As our garden wakes up in spring, so do the weeds. Before planting, get them under control. Weeds compete with garden plants, and from a soil perspective, they steal organic food away from the living soil.
For starters, fall mulching gives you the upper hand on spring weeds. Pull weeds that do emerge in the spring early and quickly, when they are small and easy to manage. If not noxious–that is, not spreading vigorously by root or stem–I suggest laying them right back on the soil surface and covering them with from 2 to 4 inches of organic mulch. Covering garden beds right from the start gives you the jump on garden weeds, while feeding the soil with organic material at the same time.
8. Recycle Perennials
If you have a landscape garden, hedges, woodlands, or fruit trees, then you have a wealth of materials to amend soils. Winter and early spring tree prunings, hedge trimmings, and perennial cuttings can feed the soil when recycled back into the garden.
Chipped yard debris and bits pruned from trees make effective mulch. When green, they also provide a valuable nitrogen source as a sheet mulch layer. Use softer perennial cuttings as mulch, sheet mulch compost, or a garden bed amendment. I like a natural look in my landscape gardens. I’ll actually chop cuttings into smaller pieces and mulch them right below the perennials I’ve cut. This type of composting in place mimics the way plant litter falls in nature.
9. Let Soils Dry

For soils, it’s often what we don’t do, as much as what we do, that matters. Before planting spring gardens, the most important soil care priority is letting wet spring soils dry. Digging, walking on, or driving a rototiller over wet soils, particularly those with clays, compacts and damages the soil structure we work so hard to build. When this happens, we literally squeeze the air out of soils, leaving little space for organisms to breathe or roots to grow.
To tell when your soils are ready to work in the spring, take a handful and squeeze. If water comes out, hold off for a week or so. Soils that form a sturdy ball when molded or clay soils that press into a shiny ribbon also need to dry more.

N.B.: This post is an update; it was first published on February 19, 2017.
For more soil enrichment tips, see:
- Landscaping: What’s the Best Soil Conditioner for Your Garden?
- Your First Garden: What You Need to Know About Topsoil
- The Garden Decoder: What Is ‘Biochar’?


Have a Question or Comment About This Post?
Join the conversation