I hate cords. Even the word “cords” is ugly. Yet they were everywhere in my life, snaking across the floor, tangled under my desk, draped over the nightstand, twining themselves around the headboard and conspiring to strangle me as I slept. I tried to corral them with twist ties, cord-wrapper hubs, plastic cord-tamer shoe boxes. But nothing worked—until I discovered five foolproof ways to put them in their place.
It started with a remodel. One day, while my designer friend Stephanie Dorfman was sitting at her kitchen table sketching new cabinets for my house, I started telling her about the bad dream I’d had the previous night. “All the computer cords and cell phone chargers were wrapped around my ankles, and there was an evil enchanted power strip, and it said, ‘Can you hear the lambs screaming, Michelle?'”
Stephanie looked up from her drawing. “Don’t worry, we can hide every cord in your house,” she said. “They’ll never be able to hurt you again.”
Sure enough, Stephanie designed clever cabinetry—for the home office, the TV room, and the master bedroom—with more secret compartments and hidden trap doors than a Vegas magician. You cannot see one single cord in the whole house. But the beauty of her system is this: you don’t need to remodel your house to hide your cords. Here are some Penn & Teller tricks that will work for you.
Photographs by Michelle Slatalla.

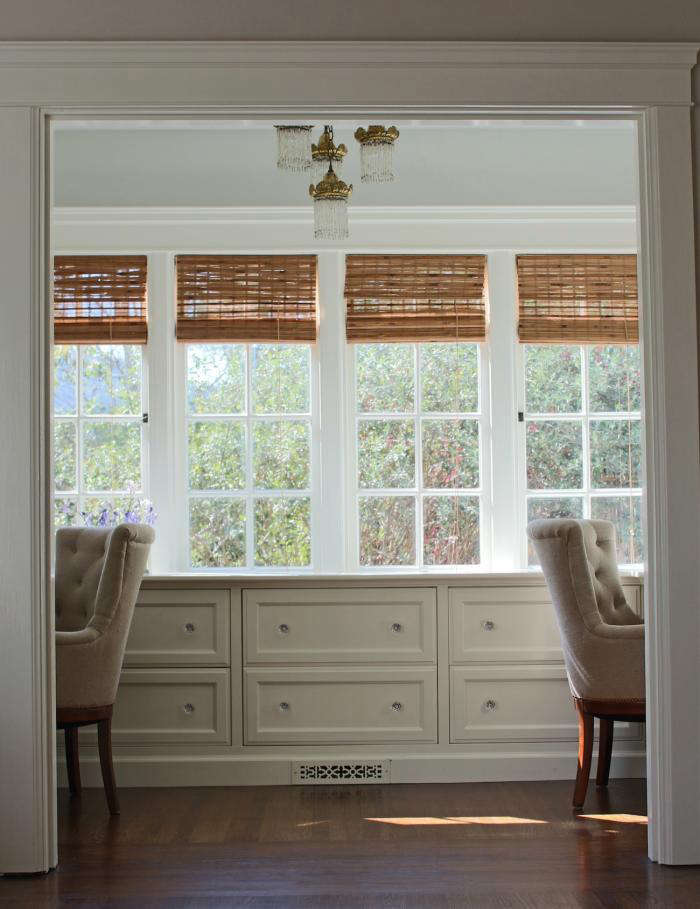
Above: The home office, where both my husband and I work, is a glorified alcove off the living room; from the front hallway, you can see straight through the house to our desks. So it was imperative that every ugly cord, charger, power strip, cable modem, and random electronic gadget be invisible. Can you spot the printer?

Above: Stephanie Dorfman’s design for the house involved false walls, pullout drawers, hidden electrical outlets, and vented doors (to prevent electronic components from overheating). In the office, the two desks and a long wall of low cabinets form a horseshoe shape.

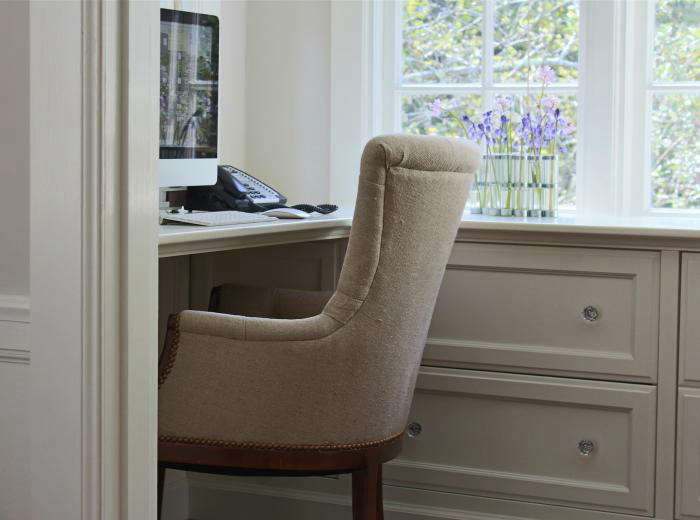
Above: Behind the U-shaped countertop is a dropped ledge; it’s 3 inches lower than the height of the countertop. On the ledge behind each of the two desks is a hole, big enough for all the cords to fit. The computer cords, the phone cords, the camera cord, even the cord from the electric pencil sharpener—they all disappear into that hole, positioned behind the pedestal of my computer monitor.
Above: There’s a false wall behind each desk. The cords drop behind the two-paneled false wall and are plugged into power strips that sit, hidden, on the floor behind.
Of course, you don’t need to install built-in cabinetry to get the same look. Stephanie suggests this simple method:
Secret No. 1: Build a false wall.
Here’s how. First make a desk, creating a base with two file cabinets such as White File Cabinets ($159 apiece from CB2) as a support for a desk top. For the desk top use a wooden door or other piece of solid wood that measures from 1.5 inches to 3 inches deep and has a 6-inch overhang when placed atop the file cabinets. For instance, if your file cabinets are 19.5 inches deep, the desktop should be 25.5 inches deep.
Position the desktop on the file cabinets to create a 1-inch overhang on the front and a 5-inch overhang on the back of the file cabinets.
Next, buy a piece of 3/8-inch-thick plywood and cut it to cover the opening below the desktop. Screw the plywood into the back of the file cabinets and paint the front of the plywood—the side facing into the room—the same color as the wall behind it. Now you have a false wall.
Above: Cords are gathered together, then threaded through the top of the ledge on the back of my desk.
Secret No. 2: Cut a hole in your desktop to make cords disappear.
Cut a 3.5-inch round hole in the back overhang. Attach a White Round Plastic Desk Grommet with Cover; $6.60 from Cable Organizer.
Secret No. 3: Don’t stint on the power strips. Behind the false wall under my desk are two Belkin 6-Outlet Home/Office Surge Protectors ($6.33 apiece from Amazon). Get two, even if you think one is enough, because there is always going to be something else you’ll want to add in the future—a desk lamp, say—to the jungle of cords in your office. Also, it’s easier to keep the cords from tangling or knotting if each one has some “air space” around it on the surge protector.

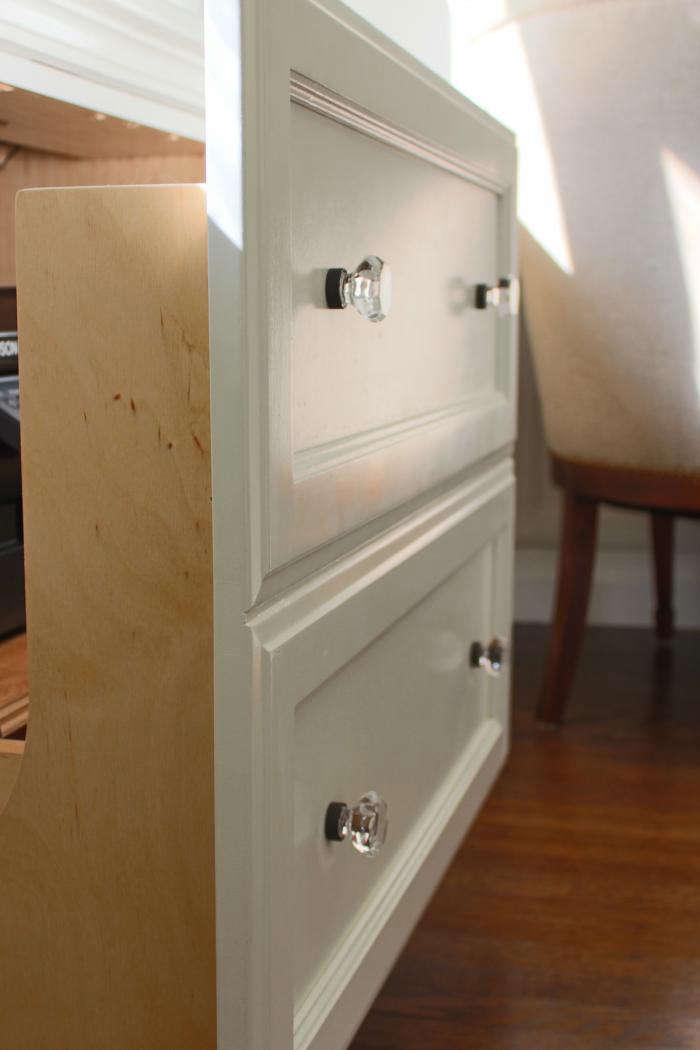
Above: Printers are very ugly. And bulky. I never want to see one again. The wall of drawers in my office includes a double-deep drawer in the middle. That’s where my printer lurks.
Secret No. 4: Buy a wireless printer such as an Epson Workforce 545 All-in-One Printer ($152 from Amazon). A wireless printer eliminates the need to run a cord between it and your computer. Getting rid of even one cord feels so sweet. Put your printer inside a drawer and install an electrical outlet inside the drawer. Plug in the printer and never again see its cord.
Above: My printer is on a sliding shelf inside the drawer. When the drawer opens, the printer rolls back, creating enough space for copies to come out the front.
Secret No. 5: Put your printer on a rolling shelf to make it easier to add paper, remove copies, and operate the controls. Sources for a wide selection of different sizes and types of glide-out shelves include Shelf Genie, Hafele, and Rev-a-Shelf.

Above: All that’s left on my desk: some Spanish bluebells from the garden.
N.B.: See more Domestic Dispatches for 7 Secrets to Make the Perfect Bed and Help! My Marble Backsplash is Stained.


Have a Question or Comment About This Post?
Join the conversation