At what point do two adults realize they need to stop dreaming of the perfect shoe rack (and stop tripping over strewn shoes)?
After searching for months, my boyfriend, Roman, and I knew exactly what we wanted: a minimal design, preferably made from wood, that would accommodate both of our shoe collections. And it had to fit neatly into the only place our 700-square-foot apartment would allow: along a 48-inch wall in our entryway. The only problem? The perfect shoe rack didn’t exist.
Can you tell where this story is going? Enter the DIY shoe rack.
After perusing Pinterest for ideas, I found one photo with a shoe rack that fit the bill (surprise, surprise, it was pinned from Remodelista). I loved that the shoe box was on casters, and looked simple to construct. That said, it turned out to be a project that’s much easier with two people (and four hands). Plus, you should be comfortable using power tools and possess an air of craftsmanship. You’ll also need at least two and a half hours from start to finish—but one hour is drying time.
Read on for a materials list and step-by-step instructions for the perfect entryway shoe rack.
Photography by Dalilah Arja for Gardenista.

Materials
- Four pieces of wood: two 4-foot planks for the bottom and top, and two 10-inch planks for each side
- Wood glue
- Four casters with brakes
- A drill (plus drill bits)
- Four 2-inch screws
- 16 3/4-inch screws
- Two clamps (but having four is better)
N.B.: Your dimensions may differ depending on the desired size of the shoe rack and the thickness of the wood.
Instructions
Step 1: Sand the edges of each piece of wood to get a smooth-to-the-touch surface.

Step 2: Lightly apply wood glue to the edge of one of the base planks. You should start with the board you intend to use for the bottom of the shoe rack. We used wood glue in addition to screws to ensure stability.

Step 3: Using clamps, secure a short plank to the base board with one clamp holding it in place vertically and one clamp holding it in place horizontally. In this position, let the glue set for 30 minutes. We used a smaller wood block to act as a clamping point. (If you have a workbench, secure the clamps and the slabs of wood to the workbench instead.)

Step 4: While the wood glue is drying, mark the drill point with a pencil or chalk. You want to drill into the center of the plank, so if your piece of wood is 1-inch thick, mark a drill point at 1/2 inch. Our wood is 3/4-inch thick, so we made a mark at 3/8 inch.

Step 5: After the wood glue is dry, drill a hole for the screw.

Step 6: Drill the screw into the hole to secure the base board to the side board.

Step 7: Repeat steps one through six on each of the eight corners.

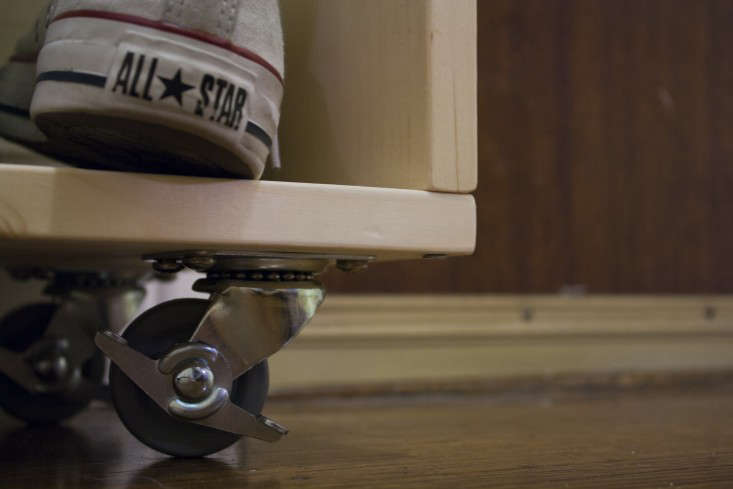
Step 8: After the wood box is fully assembled, flip it over and place the casters with 3/4-inch clearance on each side (use 1-inch clearance if your wood is 1-inch thick and so on). The idea here is to drill only into the bottom board, not the side boards. Drill a hole for the screw, then drill in the screw. Repeat this for each caster.


For more entryway projects, see DIY: Woven Rope Doormat and Steal this Look: DIY Entryway with Hairpin Leg Bench on Remodelista.


Have a Question or Comment About This Post?
Join the conversation