Maybe your family’s favorite holiday ritual involves grandma’s fruitcake, or wacky stocking stuffers, or football on the lawn (what are you, Kennedys?). At my house, we make ornaments: every year since 1972, in fact, when my mother was calling the shots and I was one of many elfin minions with glitter-glue hair and eyes crossed from sequin work.
We still cherish the remnants from the Disco Era, of course: Sequined Baby Jesus in an Eggshell gets pride of place at eye level on the Christmas tree every year. But this holiday season my three daughters and I decided it was time to make some quieter ornaments to play backup to our extensive collection of glitzier baubles.
Inspired by white tallow berries from the winter garden, we made DIY Snowballs for the Christmas tree. As ornaments go, it’s a super easy project. Glass balls, velvet ribbon, metallic paint: what’s not to love? And miraculously, no one got glitter glue in her hair.
For step-by-step instructions and materials, see below:
Photography by Ella Quittner except where noted..

Above: Basically, all you have to do is pick tallow berries from their stems, drop them into glass balls (think “snowglobe effect”) and tie on a ribbon to hang the ornaments. Here’s what you need to get started:
Materials:
- 2.5-inch glass balls, such as Clear Glass Ornament Balls With Silver Tops; six for $12 at Save on Crafts.
- Tallow Berries; 20 stems for $12 from Save on Crafts.
- 3/8-inch Gray Velvet Ribbon; 2.50 for three yards from Talksite via Etsy.
- Metallic gray paint, such as Martha Stewart Living Thundercloud; $4.38 for a 10-ounce can from Home Depot.
- Paintbrush.
- Scissors.

Above: The glass balls came with shiny silver fittings we wanted to tone down. One coat of Thundercloud paint turns shiny into subdued.

Above: My elfin minions (from L): Zoe, Clem, and Ella.

Above: We opted for gray velvet ribbon to complement Martha’s gray paint.

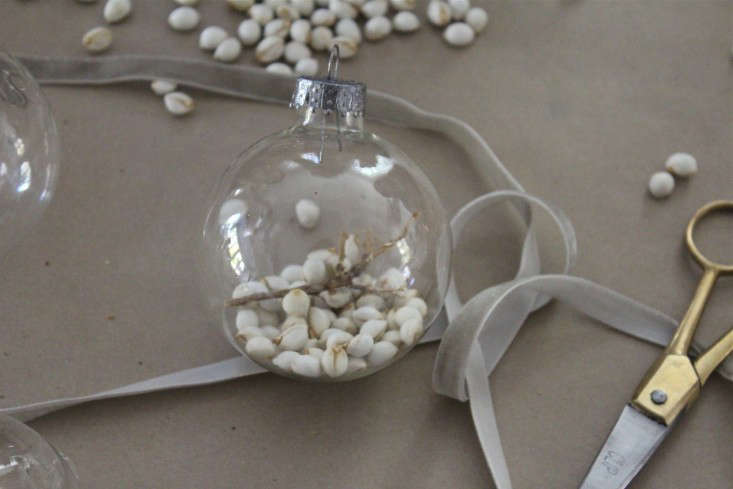
Above: Picking off the tallow berries was easy; they pop right off the stems.

Above: You can fill the glass balls with as many (or few) berries as you want; we experimented with adding a bit of stem for architectural interest.

Above: You can theoretically shake them like real snowglobes, but we were a little scared of shattering the glass.

Above: We cut an 8-inch length of ribbon for each ornament…

Above: … and tied a bow.

Above: You must have carols playing while you work. Our recommended background music is James Taylor at Christmas ($5.99 from Amazon).
Above: Next year we decided we might add just a touch of glitter to the berries…or a few silver sequins. We all inherited my mother’s genes, after all.
Looking for more DIY garden-to-ornament ideas? See Gilded Tree, Inspired by Nature.


Have a Question or Comment About This Post?
Join the conversation