When it comes to creating seasonal arrangements, New York City floral designer Emily Thompson knows a thing or two. As a member of her team, I have seen her shop brimming with bails and buckets of local materials–wild sweet peas that look as if they’ve been tie-dyed with color, giant brambles of smilax vine, a very large tree stump that caused a dent in the truck that hauled it, crates of pine cones from the forest floors of the North East Kingdom. She once took a day off, only to come back to the studio with a load of wild thistle from the shore. Working for Emily is a true adventure in learning about seasonal and local materials.
Emily’s arrangements–whether strictly made of local materials or not–evoke landscapes that are of a particular area and time, something I hear her say often. What better season to capitalize on the local bounty than in spring, when local materials are just starting to pour in? With spring comes an abundance of blooms, and and array of flowering branches that we’ve all been waiting to see and smell. To me, these materials are the quintessential ingredients for an Emily Thompson arrangement–clouds of dogwood, spirea and magnolia, bowlfuls of hellebores, a pitcher of daffodils.
Photographs by Sophia Moreno-Bunge for Gardenista.

Above: Hellebores, magnolias, and crocuses, among other ingredients for a seasonal spring arrangement.
For this arrangement, Emily chose magnolia, a variety of hellebores and ranunculus from a local grower Hautau and Sons, strawberry leaves from her own garden, and, of course, crocus blooms, with the bulbs attached.

Above: Crocus bulbs and strawberry leaves ready to be arranged.

Above: A brambled vase. Emily chose a vase by Frances Palmer, made specifically for Emily Thompson’s new shop. This vase is perfect for arranging because of its tapered shape. A collection of Frances Palmer vases is available at Emily’s South Street Seaport shop in downtown Manhattan. For information, email [email protected]
Emily often starts her arrangements by creating a nest or bramble of branches in the vase. The bramble helps keep stems in the right place. When starting your own arrangement, make sure you strip a branch of its leaves before creating the nest, so the leaves do not rot in the water. Next, create a tape grid across the top of the vase. You’ll want to tape along the entire outer edge of the vase as well, to keep the edges of the tape grid from coming off with water that might slosh over the lip.

Above: Building a base of branches.
Next, think of a shape you wish to create with your arrangement–in this case, Emily decided on a crescent–and then arrange a base with branches to reflect that shape. Try using branches of different heights, and use the branches’ natural shape to create the desired shape. Think not only about the shape that the branches themselves create, but also about the negative space around the branches.

Above: The finished magnolia base.
Make sure you cut stems at a diagonal, and make sure they reach the bottom of the vase whenever possible (this way they’ll be fully submerged as the water levels go down). Turn the vase as you go, making sure it looks good from every angle, adding branches where necessary.

Above: The next step is to add a second element. Emily loves for her arrangements to have concentrated areas of singular materials. Here, a cascade of dark hellebores creates depth and contrast.

Above: These two-toned hellebores extend the shape of the crescent a bit. Hellebores love to drink water, so cut their stems at a diagonal, and give them a second cut, splitting the bottom inch of the stem into two.

Above: A river of ranunculus that runs from the back to spill over the front lip grounds the arrangement, and adds a rich contrast in color.

Above: Next come the finishing touches–patches of crocus and strawberry leaves. Spray the crocus roots with water to keep them hydrated, and place them where they’ll rest comfortably. Emily prefers that the roots be as visible as possible. The crocus’s spiky leaves create a nice contrast to the rest of the textures that are much softer and more dense.

Above: A patch of green, and crocus bloom.
Emily’s arrangements often have patches where your eye can take a rest from flower and color. These areas of foliage make her arrangements feel as if they are alive. Emily says she likes for “the proportion of flora to foliage to be like it is in nature.” 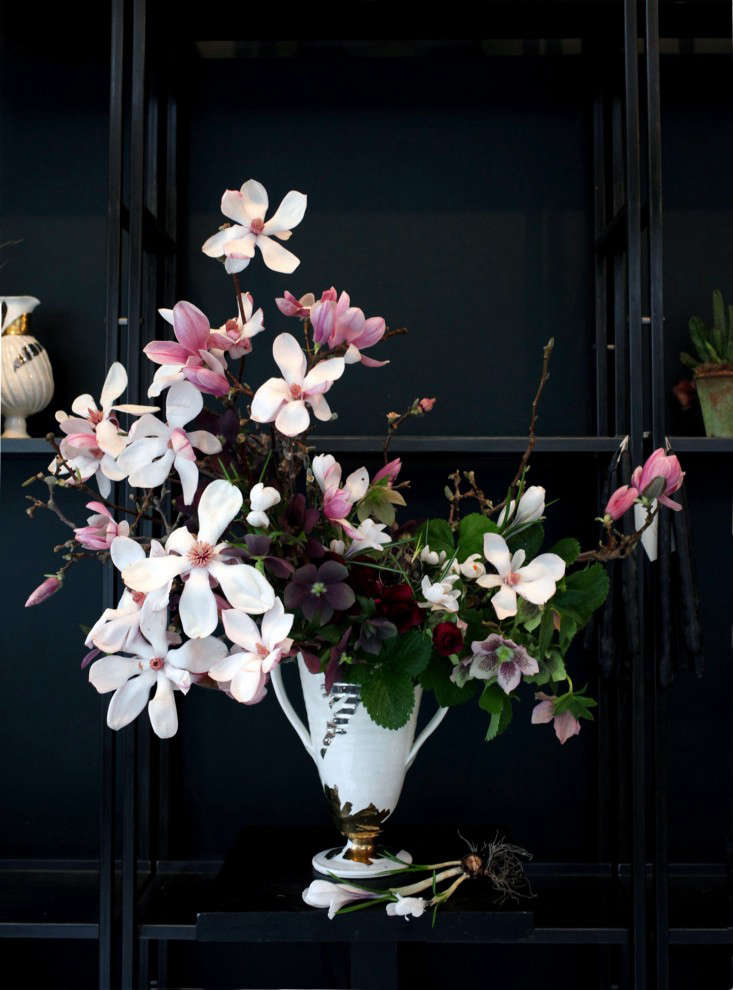
Above: The finished arrangement.
For more floral inspiration, see all of our Spring Floral Arrangements posts. For more from Frances Palmer, see For Valentine’s Day: Frances Palmer’s Bud Vases.


Have a Question or Comment About This Post?
Join the conversation