Umeboshi are traditional fermented Japanese pickles made from under-ripe ume—the fruit of Prunus mume, a Japanese apricot. Fermented in a syrupy brine, the firm, raw ume are transformed into soft and mouthwateringly tangy pickles with a reputation as a probiotic hangover cure and source of antioxidants. While they are commercially available, homemade umeboshi are next-level in terms of flavor and texture. (For label readers, they also contain no artificial coloring or additives.)
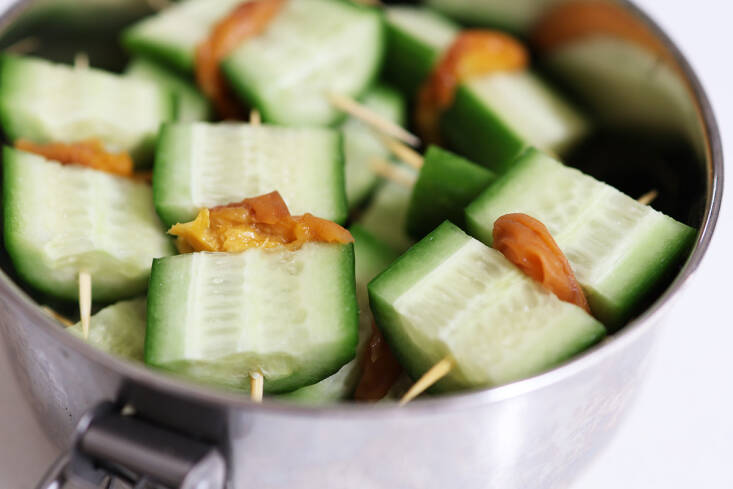
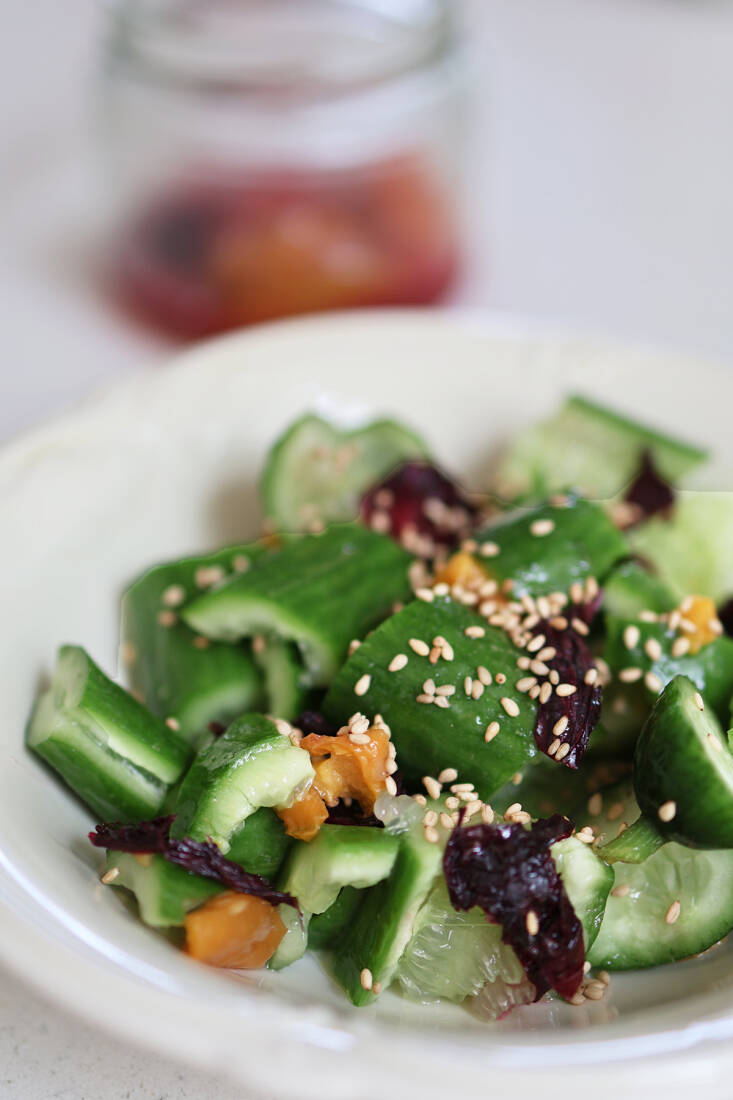
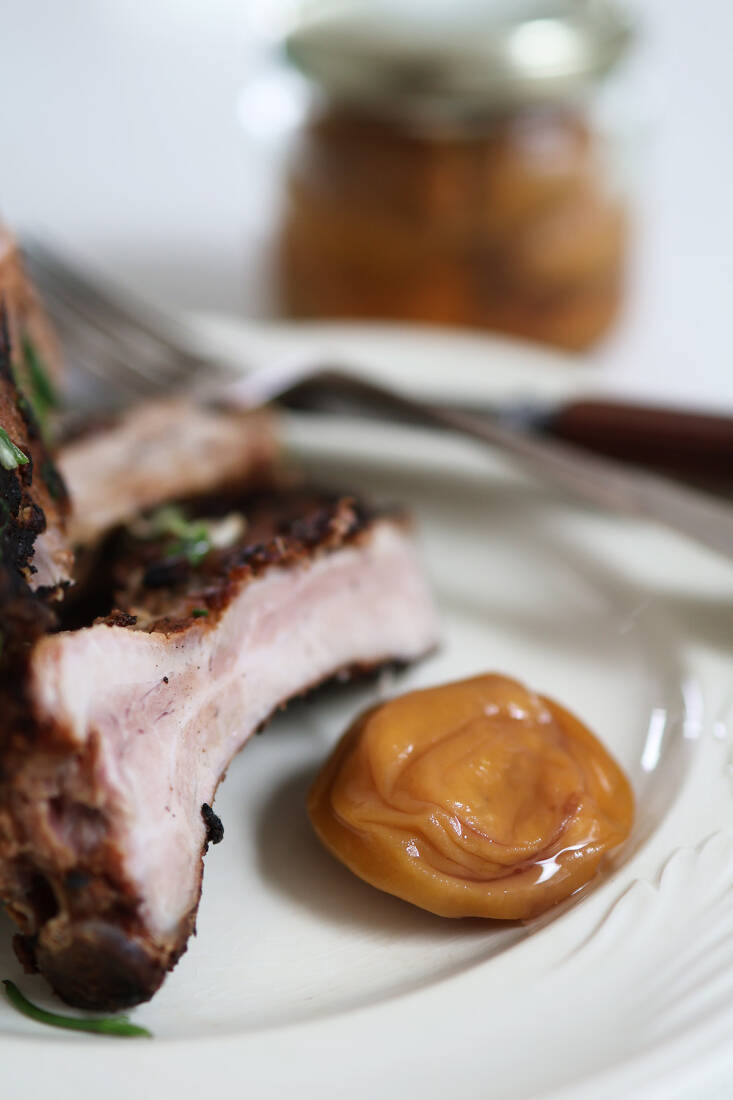
Umeboshi are a bracingly delicious foil for mild, sticky rice, or tossed into quick, cooling summer salads where cucumber and shiso mingle. I also like to deploy them non-traditionally, as Western-style pickles on cheese boards, or as a brightly flavored contrast for rich meats like duck and pork.
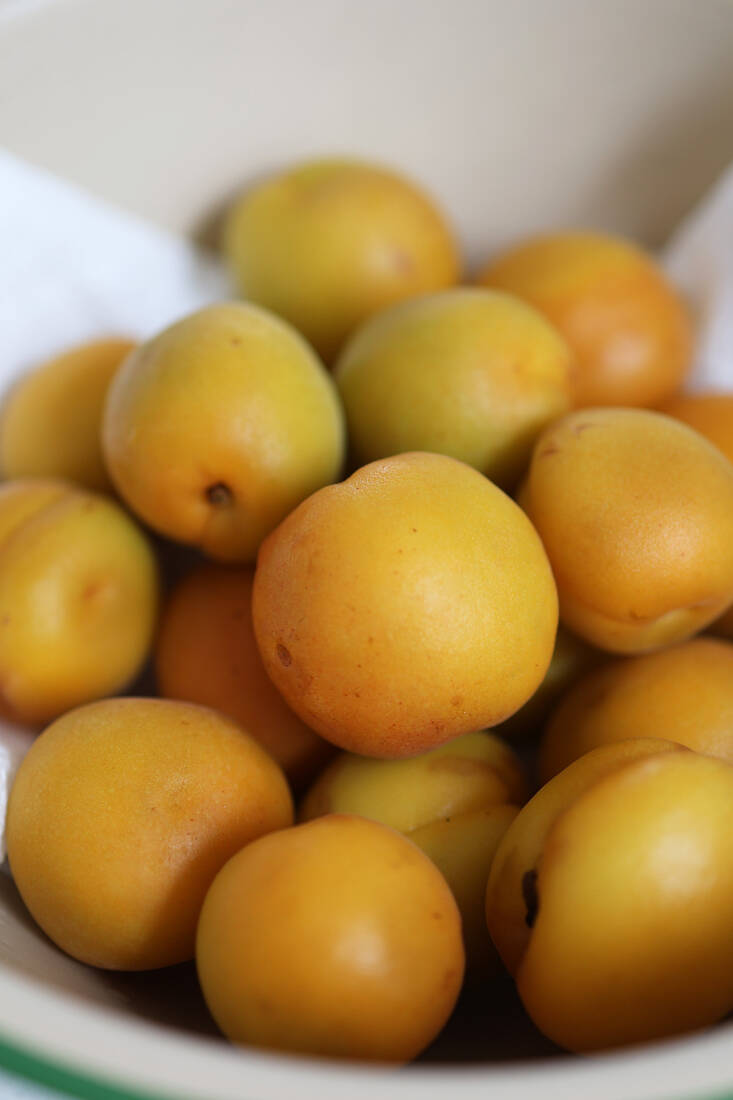
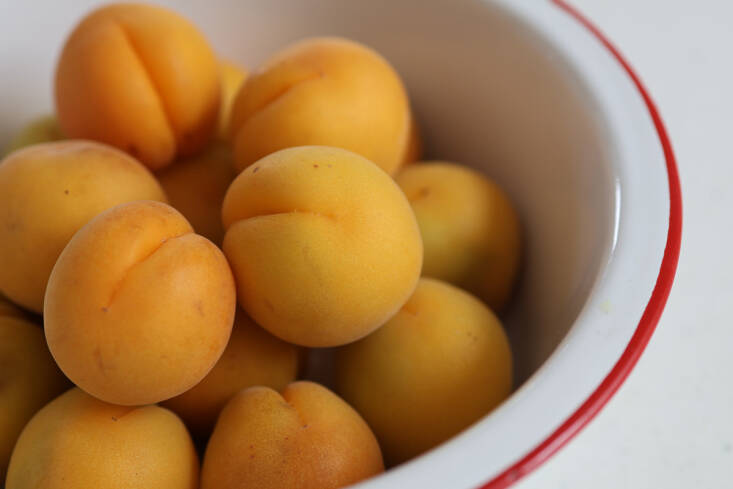
While ume are sometimes referred to as Japanese plums in English, plums they are not. In appearance, fresh ume look almost exactly like their close apricot cousins (Prunus armeniaca), except that their pits are not loose. Ume’s ripe flavor is more acidic than ripe apricots’—to make umeboshi, the fruit must be unripe.
A handful of California growers offers ume briefly during late spring. I order mine from Nicholas Family Farms, in California’s Central Valley, and know to jump on the text message that Penny Nichols sends when the organically grown fruit are just right. Most ume sold domestically are shipped green and rock hard, which is too unripe; the green fruit are fine for making umeshu, a heady liquor infusion, and I have even salted them, but the result is very different. It is not easy to find a grower who will ship ume at the essential (but ephemeral and very delicate) stage of unripeness where the fruit has a blush of color but is still firm.
Because they are not easy to source in the United States, and are expensive as a result, I have also used unripe apricots as a substitute—the results are surprisingly good.
I took my first umeboshi-making cues from the method detailed by Nancy Singleton Hachisu in her excellent book Preserving the Japanese Way (which has recently been re-issued). The lucky author uses fruit from her family’s orchard. I adapted her method to the more modest weights of fruit I work with at home (the stipulated 10lbs might have bankrupted me) and to the equipment in my kitchen.
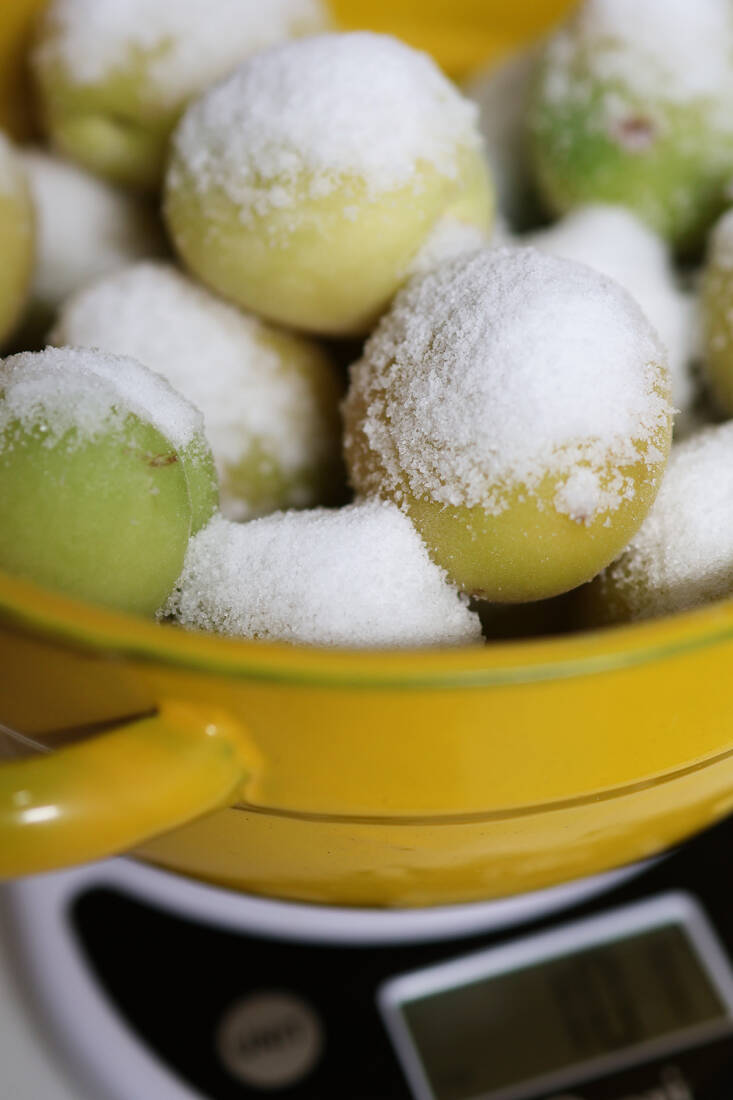
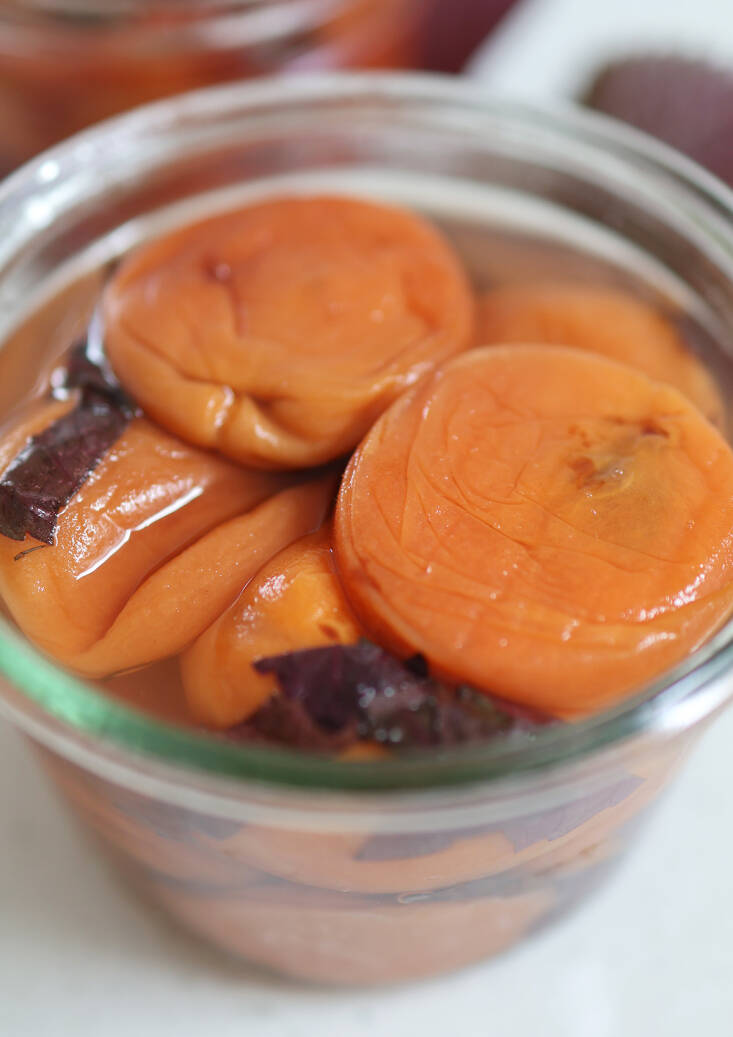
The only ingredients in umeboshi are ume and salt. Some umeboshi recipes call for 20 percent salt (meaning 20 percent of the fruits’ weight), while Nancy’s requires 8 percent. For me, 10 percent is the (salty) sweet spot. Some umeboshi are later cured alongside red shiso, which adds additional flavor as well as a darker red color. My own shiso is ready to harvest when New York apricots are beginning to come to market. It is not ready when the California ume are at the right stage of unripeness.
Umeboshi: Salted Japanse plums
To make umeboshi you’ll need under-ripe ume or apricots that have begun to turn color but are still very firm. If you have a different amount of fruit, simply calculate 10 percent (or close to 10 percent) of its weight in salt. (It’s sometimes easier to calculate if you convert into grams, using a digital scale.)
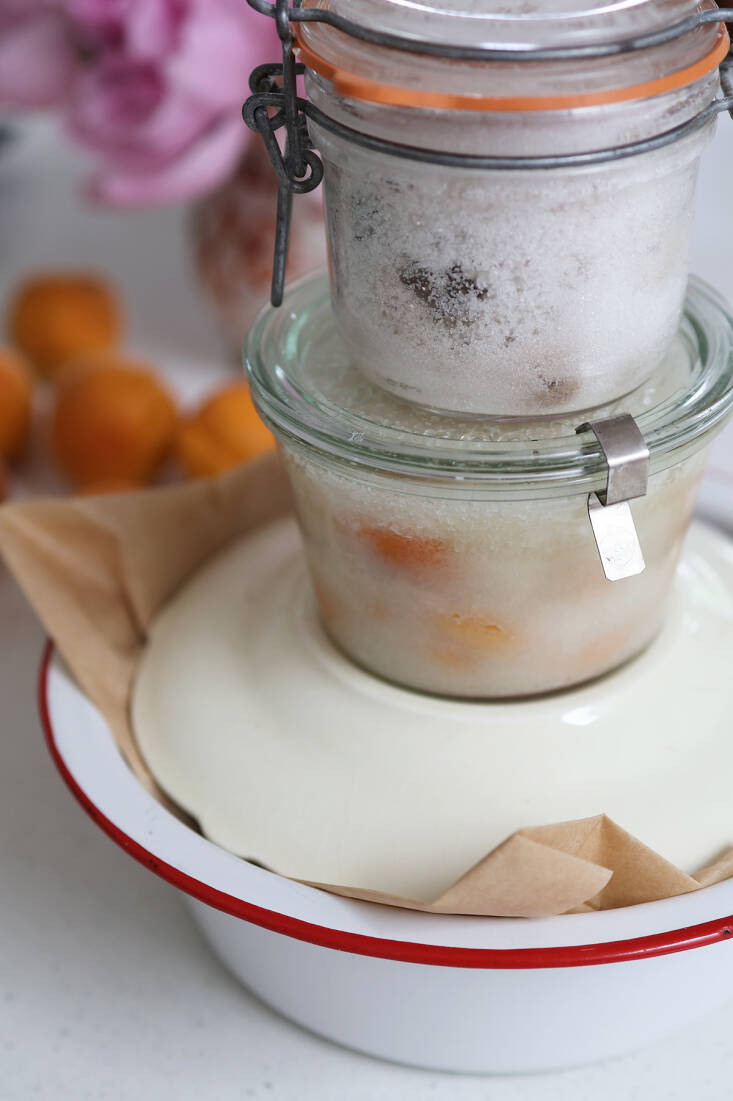
In terms of equipment, you need a receptacle to hold the fruit, a way to weigh it down as a salty syrup forms, and, for the final step, either wire racks or mats to dry them for three days before they are stored. A net is helpful during the drying stage, to keep insects off.
- 2 lbs unripe ume or unripe apricots
- 3 oz fine or coarse sea salt
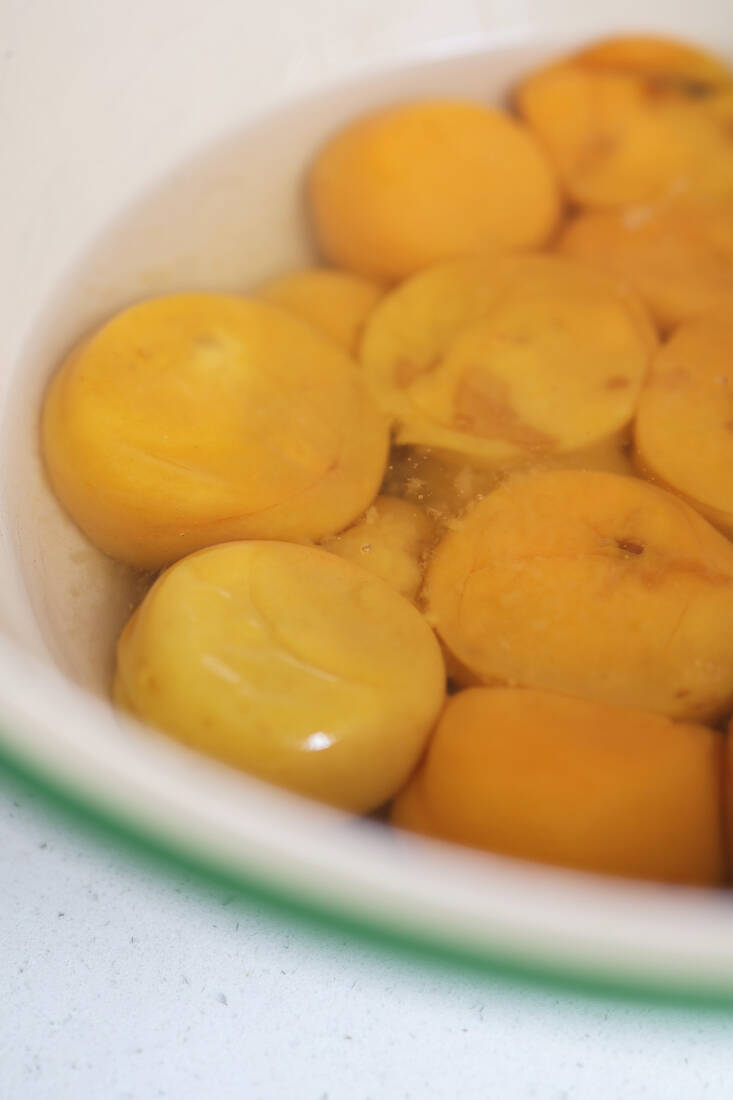
Wash and rinse the fruit and place in a bowl of water overnight to soak. Dry it well, and layer the fruit in very clean bowl with the sea salt. Massage the salt and fruit gently. Fold a double-layered square of baking parchment to cover the ume. Find a saucer or small plate that fits atop the fruit, and weigh that down with heavy jars or cans. Set the bowl in a cool closet or room, or on a countertop away from any heat source. After a couple of days check the fruit (wash your hands first); you should notice the brine rising above the ume. Soon, it should cover them and will rise above the plate. Leave the ume in their brine for at least three weeks. They will feel soft.
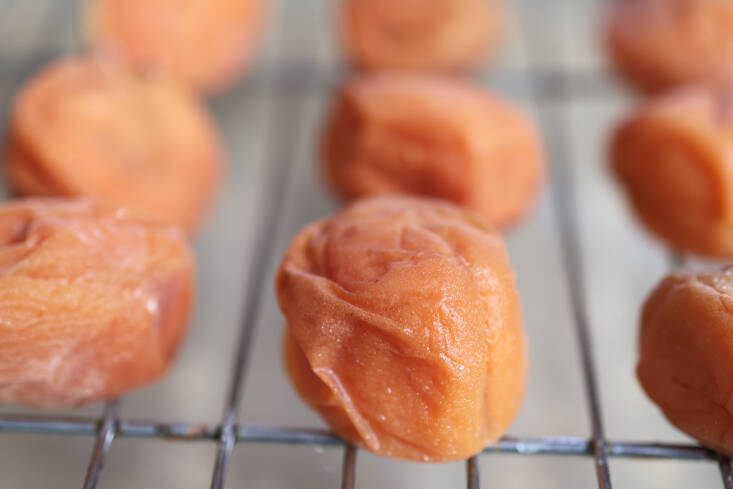
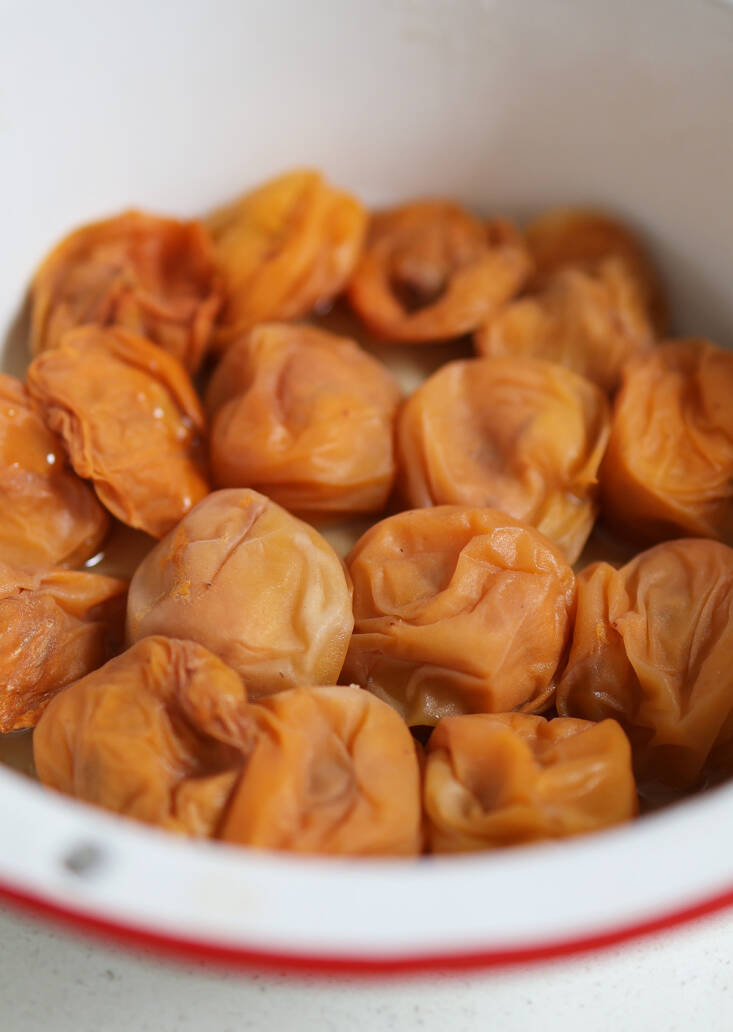
Remove the soft, syrupy ume and transfer (with clean hands) to wire cooling racks or sushi mats and place in the sun all day for three days. Return them to their brine each night. (No sun? It’s okay to skip a day and put them out again when it is sunny.) After the third day pack your umeboshi into sterilized jars. Traditionally, the brine (umesu) is strained off and bottled to use as a tonic-vinegar. I have also packed some of my umeboshi batches back in their brine, which makes for a softer pickle.
Because of the high salt content I find they need no refrigeration.
Serve umeboshi sparingly with steamed rice, alongside rich meats or roasted root vegetables, with crisp vegetable like radish and cucumber, or chopped and whipped into mayonnaise or butter as a dip or a spread.


Have a Question or Comment About This Post?
Join the conversation