Growing microgreens indoors soothes a late-winter longing. There is something about the last few weeks before the vernal equinox—a deep, twitching desire to tend, and to grow; to see vulnerable green seedlings emerge; to harvest and to eat a crop we have cultivated ourselves. On my own terrace there is still ice in pots, a small pile of snow. And while some early spring greens like mustards and arugula appreciate a lick of frost, it’s still too early to sow them. Microgreens come to the rescue. They are ready to harvest in a week and even a small handful satisfies that desire to nurture new green things, and to create something delicious with them, even if it is gone in a few, peppery bites.
Here’s how to grow your own microgreens, and a recipe for an easy feta dip they can adorn.
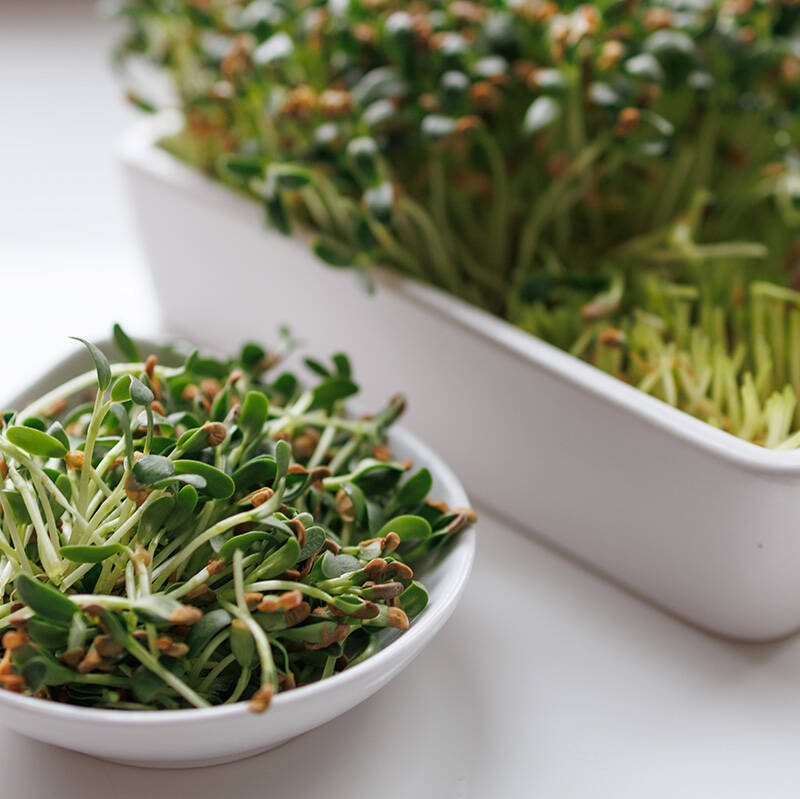
Photography by Marie Viljoen.

You need five things to grow microgreens: a container, growing media, seeds, water, and a windowsill (it does not have to receive direct sunlight). I prefer reusable trays so that I can germinate my little greens year-round, and I also want to avoid buying the plastic cover that many purveyors include. Hunting around the internet, I found Back to the Roots, and was drawn to the petite white ceramic dishes in one of their many kits. At 6.5 x 4.5 inches they were a little too petite, so I bought three. Each comes equipped with a coconut coir puck that expands when watered; a cardboard cover that doubles as a to-do list; and a packet of organic brassica seeds (broccoli, kale, and mustard). Ready, set, go:

For children learning to grow their first seeds, these grow kits are just the right size, and the clear instructions with daily check boxes will add to a feeling of confidence and a job well done. I am not a child, and I have been growing my own food for decades. But they appealed to me, too, perhaps because I didn’t have to think. I did exactly as instructed, down to measuring water by the tablespoonful. Soothing.


The one instruction I did not follow, and should have, was to sow an entire packet of seeds in each tray. Do it. My microgreens came up more sparsely than intended. This is a case when crowding is encouraged.

We ate them at once, strewn across a smooth feta, yogurt, and tahini dip.

The rest of our little crop topped a citrus salad, bright and assertively flavored, and exactly what the waning days of February require.

You don’t need special containers to grow your own microgreens. Unlike most other plants, these infant seedlings do not require drainage because they are so short-lived. My second batch was sown in a clean terra cotta saucer. You could also use stainless steel baking sheets, ceramic baking dishes, and egg cartons.

While you could use potting soil, coir pucks are very convenient. I purchased a bag of 40mm pucks online and used two in an eight-inch saucer, rehydrating them with a half cup of water.


Next time, I’ll sow arugula and radish seeds separately.
The seeds of any vegetable or herb can be used for growing microgreens. Brassicas, in the so-called cruciferous family (named for their cross-shaped flowers), have the pleasing peppery flavor I like in these tidbits, and they have the most nutrition, bite for bite. Broccoli, cauliflower, cabbages, kohlrabi, mustards, arugula, brussels sprouts—each qualify. Spices like fenugreek and coriander are fun and flavorful, provided the seeds are fresh.

There is another seed option, which adds earth-friendly, invasivore fun to outdoor excursions: wild microgreens. Invasive mustards like garlic mustard (Alliaria petiolata) in the Eastern states and black mustard (Brassica nigra) on the West Coast are environmental scourges, producing thousands of seeds per plant at the end of their flowering season. Gather handfuls of their mature, skinny seed pods in early summer, shake them out, and germinate your own, back home. Other feral seeds that work well include lamb’s quarters and amaranths.

Feta and Yogurt Dip with Microgreens
This creamy, satisfying dip is excellent with crisp, raw vegetables, but it is versatile (see below). Feta that is packaged in brine has a better consistency than the crumbled versions. I am partial to sheep’s milk, and other white cheeses in brine can also be used, if you are lucky enough to live near the Balkan or Middle Eastern markets that sell them. You are unlikely to need additional salt, but always taste, to check.
- 6 oz feta, broken up
- ¼ cup Greek yogurt
- 1 Tablespoon tahini
- ¼ teaspoon lemon zest
- 3 small celery ribs from the heart, finely chopped
- 3 Tablespoons extra virgin olive oil
- A flurry of microgreens
- Urfa biber (optional)
- Black pepper (optional)
- Raw vegetables (optional)
In a food processor combine the feta cheese with the yogurt and the tahini. Pulse until the mixture is smooth, scraping the sides down a few times to dislodge any whole lumps of feta. Spoon the smooth dip onto a serving plate, leaving some depressions on the surface for the olive oil to pool. Scatter the chopped celery across. Drizzle the olive oil over the surface, add the microgreens, and top with your raw vegetables before finishing with the urfa biber and black pepper, if using.
The dip, finished with the necessary bite of spicy microgreens, can also be:
- slathered onto toast and briefly broiled.
- tossed with warm, just-cooked vegetables, like carrots.
- spooned into a pillowy bed for beans or chickpeas.
- whisked into a thick dressing for chunky romaine or iceberg lettuce.
- piled up as a foundation for warm, poached eggs.
- mixed into egg salad in lieu of less-healthy mayonnaise.
See also:
- Ask the Expert: 9 Tips to Grow Edible Microgreens
- 10 Easy Pieces: Countertop Vegetable-Growing Kits
- 10 Ideas to Steal from Chefs’ Gardens Around the World


Have a Question or Comment About This Post?
Join the conversation