Icon - Arrow LeftAn icon we use to indicate a rightwards action. Icon - Arrow RightAn icon we use to indicate a leftwards action. Icon - External LinkAn icon we use to indicate a button link is external. Icon - MessageThe icon we use to represent an email action. Icon - Down ChevronUsed to indicate a dropdown. Icon - CloseUsed to indicate a close action. Icon - Dropdown ArrowUsed to indicate a dropdown. Icon - Location PinUsed to showcase a location on a map. Icon - Zoom OutUsed to indicate a zoom out action on a map. Icon - Zoom InUsed to indicate a zoom in action on a map. Icon - SearchUsed to indicate a search action. Icon - EmailUsed to indicate an emai action. Icon - FacebookFacebooks brand mark for use in social sharing icons. flipboard Icon - InstagramInstagrams brand mark for use in social sharing icons. Icon - PinterestPinterests brand mark for use in social sharing icons. Icon - TwitterTwitters brand mark for use in social sharing icons. Icon - Check MarkA check mark for checkbox buttons.
You are reading

DIY: A Dried Fruit Garland for the Holidays

Search

DIY: A Dried Fruit Garland for the Holidays

December 5, 2019

For insight into how I turned out the way I did, consider the year that my mother declared that we’d have an “18th-century Christmas.” While our friends asked Santa for American Girl dolls, Adidas Samba sneakers, and fluorescent-haired trolls, my sisters and I were left to scratch out lists that included wishes for wool mittens and scarves. The guideline was that all the gifts had to be homemade, or at the least, something that children in the 18th century might have received. It took some convincing to get us onboard.

On Christmas morning, our stockings hung heavy with oranges and walnuts and beeswax candles. We all did our best to look amused.

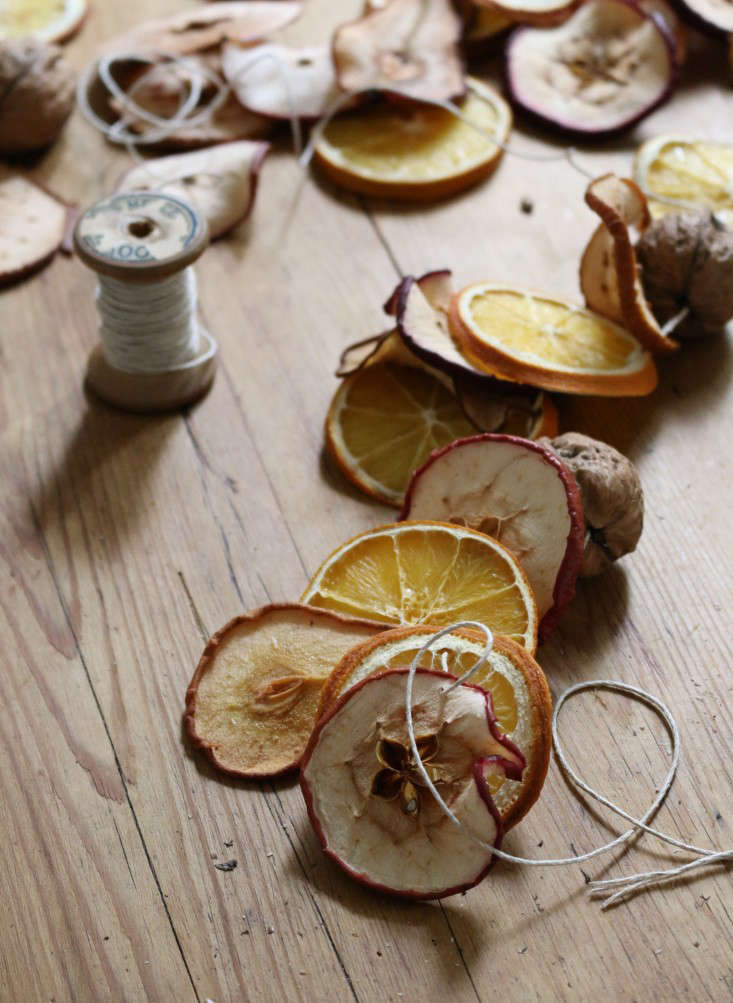
Read on for step-by-step instructions to make your own dried fruit garland for the holidays:

Photography by Erin Boyle.

Despite my lack of enthusiasm for my mom&#8\2\17;s scheme at the time, to this day I have a soft spot for anything that smacks of, well, an \18th-century Christmas. I made this dried fruit garland to deck my halls.
Above: Despite my lack of enthusiasm for my mom’s scheme at the time, to this day I have a soft spot for anything that smacks of, well, an 18th-century Christmas. I made this dried fruit garland to deck my halls.

In case there’s a historian in the crowd, it should be noted that the history of decorating wreaths and garlands with dried fruit dates from the early 20th century and the height of the Colonial Revival era, and not from the Colonial period itself. The thought of sacrificing an orange for décor would have been unthinkable to the colonists. …Details.

Here’s what you’ll need:

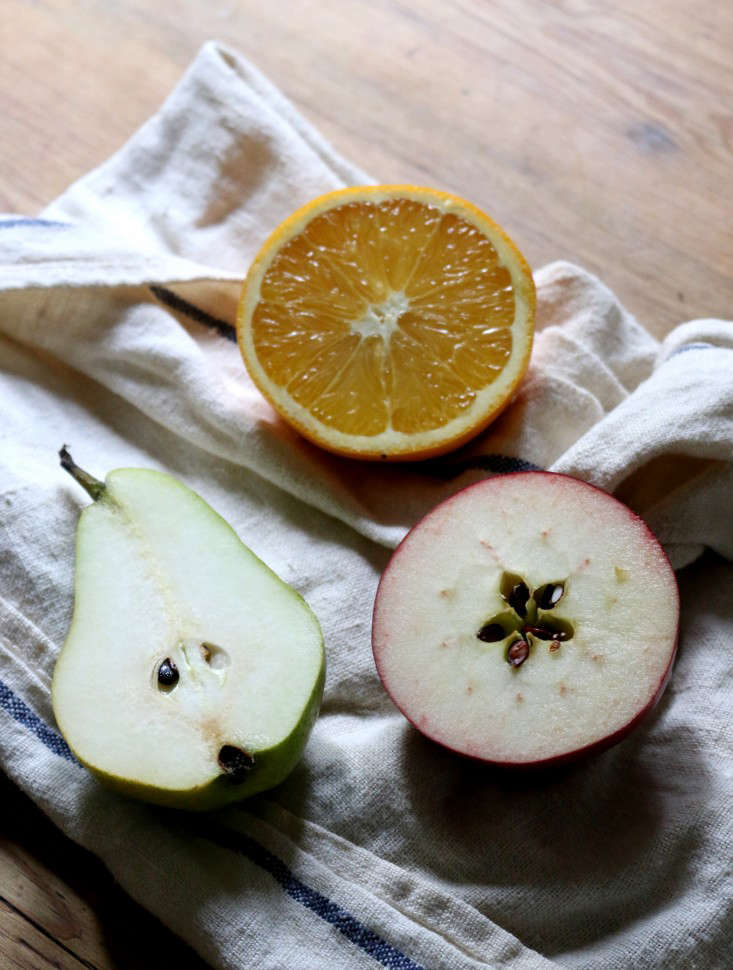
  • Assorted apples, pears, and oranges
  • Walnuts
  • Upholstery needles
  • Twine
  • Cookie rack
  • Cookie sheet

1. Choose a variety brightly colored apples, pears, and oranges.

The colored peels will make the garland more beautiful.
Above: The colored peels will make the garland more beautiful.

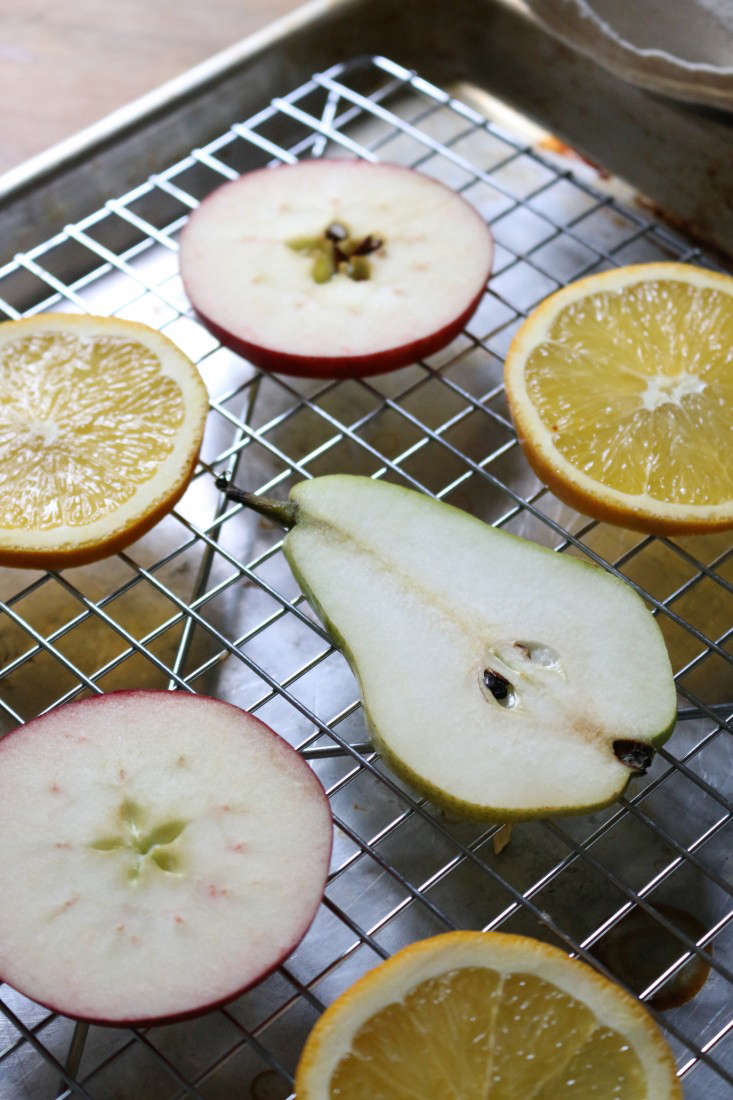
Step 2: Slice fruit into 1/4-inch slices.

Slice through the center of the fruit. Prepare to sacrifice your first few fruits (make fruit salad from the duds!) because it takes a bit of practice to get a clean cut.
Above: Slice through the center of the fruit. Prepare to sacrifice your first few fruits (make fruit salad from the duds!) because it takes a bit of practice to get a clean cut.

3. Place sliced fruit on a cookie rack on top of a cookie sheet.

Elevating the fruit on a rack allows air to circulate to help fruit to dry evenly.
Above: Elevating the fruit on a rack allows air to circulate to help fruit to dry evenly.

4. Bake at 150 degrees for from five to six hours.

Yes, you read that right. This is a project for a lazy (and chilly) afternoon at home. The next time I make a garland, I might try air drying the fruit (See Justine&#8\2\17;s Dried Vegetables to see how).
Above: Yes, you read that right. This is a project for a lazy (and chilly) afternoon at home. The next time I make a garland, I might try air drying the fruit (See Justine’s Dried Vegetables to see how).

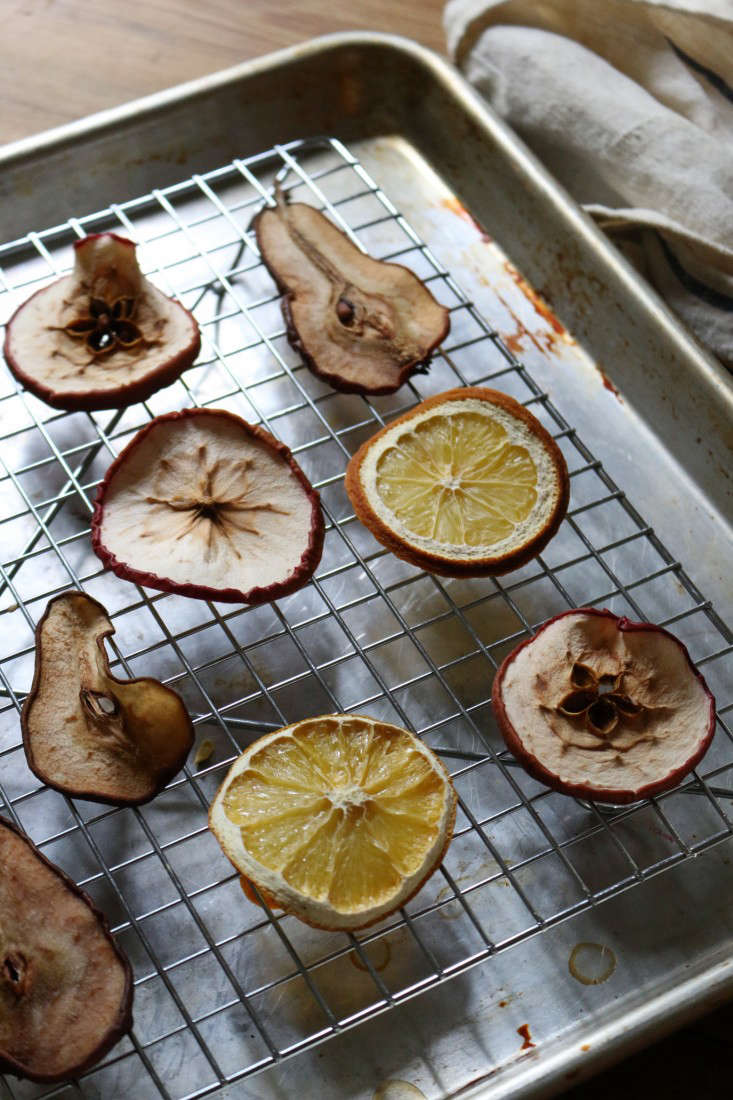
5: When the fruit is visibly dried, remove from the oven.

Allow fruit to cool before proceeding.
Above: Allow fruit to cool before proceeding.

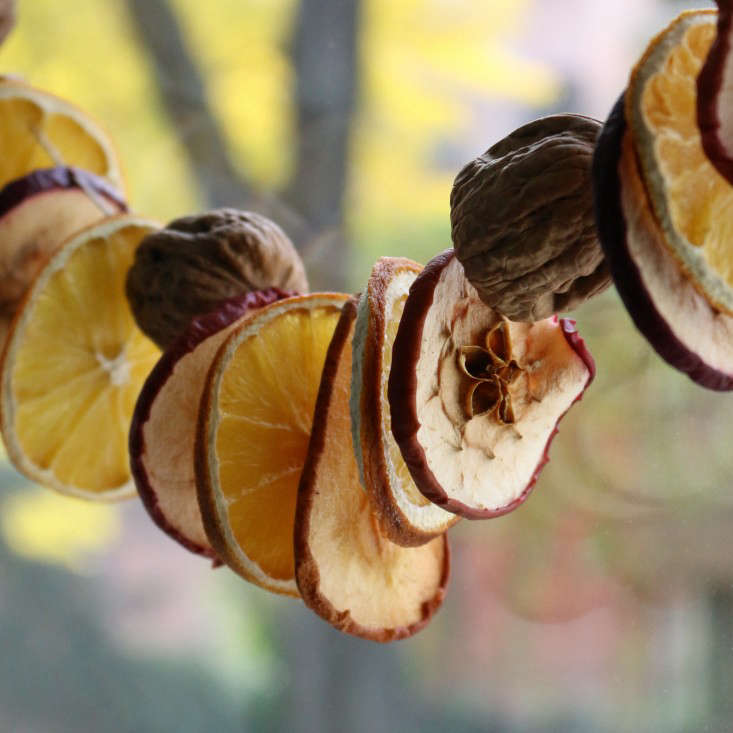
6: Use an upholstery needle to thread the dried fruit onto thin twine.

You can also add walnuts or cinnamon sticks to the garland.
Above: You can also add walnuts or cinnamon sticks to the garland.

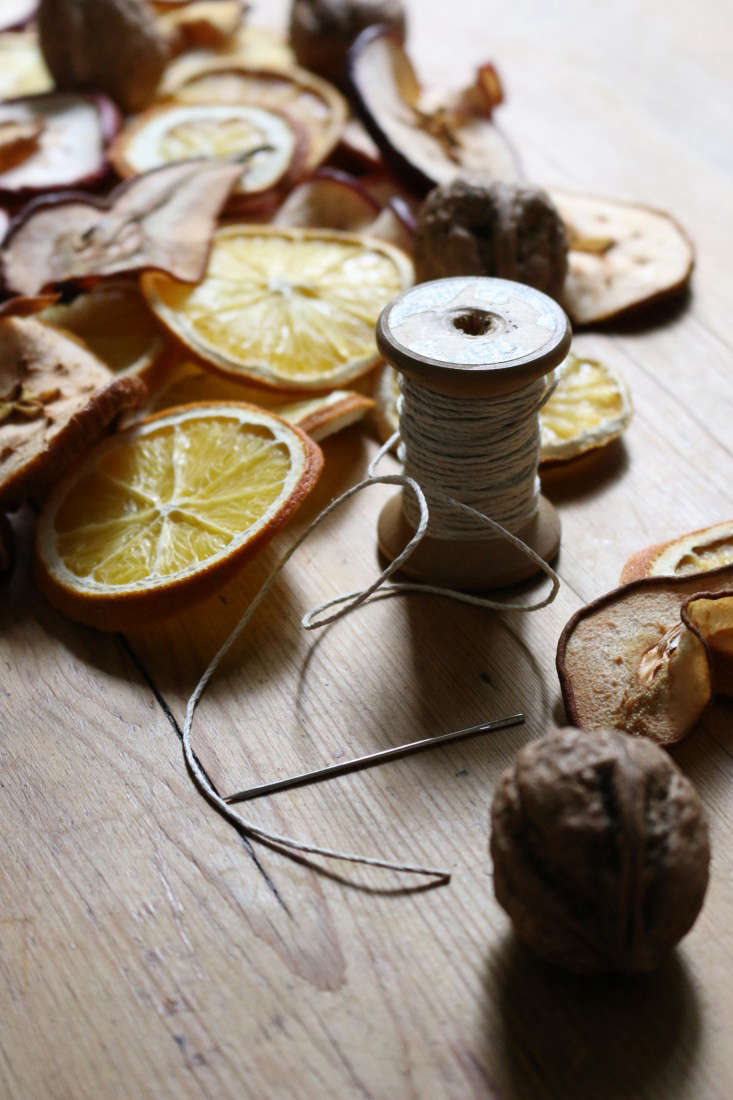
7. If you include walnuts or cinnamon sticks, use a hammer.

With a hammer, gently tap the top of the needle through the top of the hard surfaces of the nuts and spices.
Above: With a hammer, gently tap the top of the needle through the top of the hard surfaces of the nuts and spices.

8. Hang the garland in a sunny spot to enjoy all season.

The dried fruit looks particularly pretty with sunlight coming through the slices.
Above: The dried fruit looks particularly pretty with sunlight coming through the slices.

See more ways to add edible plants and garden flowers you your holiday decor:

(Visited 11,757 times, 2 visits today)
You need to login or register to view and manage your bookmarks.

Have a Question or Comment About This Post?

Join the conversation

v5.0