Let me begin by saying that weaving your own doormat is a thing to do if you have a lot of spare time and a keen desire to flex your DIY muscles, to say nothing of your forearms.
The supplies necessary are few–just some rope and a pair of gloves to protect hands. But making my own doormat did require a certain amount of stamina and a willing partner in crime.
Read on for a materials list and step-by-step instructions:
Photography by Erin Boyle for Gardenista.

Above: My finished rope doormat. In an effort to ease you through the process, I’ve given step-by-step instructions below using a clothesline to create an ocean plait knot in miniature. I strongly encourage you to make a miniature version before wrestling with the 1/2 inch diameter rope shown here. Get the hang of the tying process first, before trying to pull 100 feet of rope through a knot. It’s a much friendlier approach to the project.

Materials:
- 100 feet 1/2″ Manila Rope ($0.26 per foot at Knot and Rope Supply)
- Electrical tape
- Garden gloves
- Hot glue gun (optional)
Instructions:

Above: You’ll begin by tying a simple knot at one end of the rope. I made a tail of about 4 feet to be safe. (When you work with the full-size rope, wrap the two ends of the rope with electrical tape to keep them from fraying.)

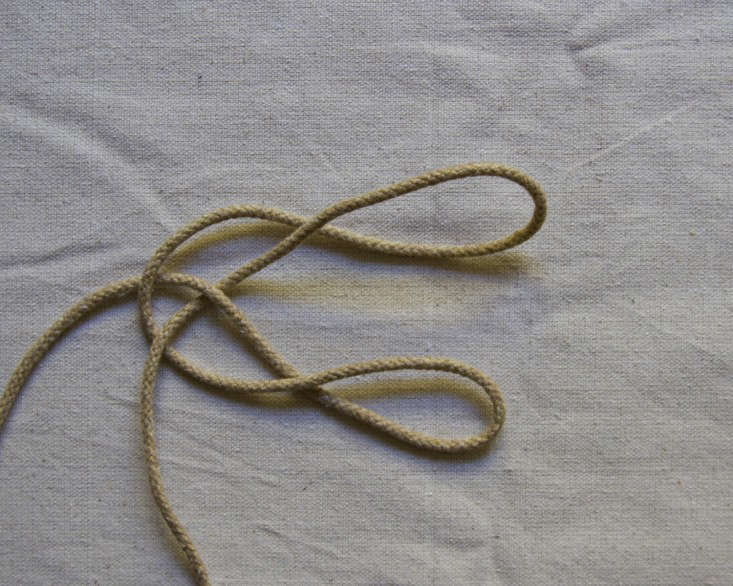
Above: Loosen the knot until you see a kind of pretzel shape.

Above: Loosen each side of the pretzel in order to form two oblong bights–the fancy knot-tying lingo to mean the curved section of rope. The size of these bights will be roughly the size of your finished mat. When you begin to use the full-sized rope, make each bight about 2.5 feet long.
Above: Twist each bight as shown.

Above: Stack the two loops one on top of the other by bringing the bottom loop upward, and drawing the top loop down to cross over the bottom, as shown.
Above: Secure the knot by drawing the short end of the rope up through the knot as shown. The short end of the rope will stay in this upper right-hand position from here on.

Above: Position the long length of rope in the upper left-hand corner.

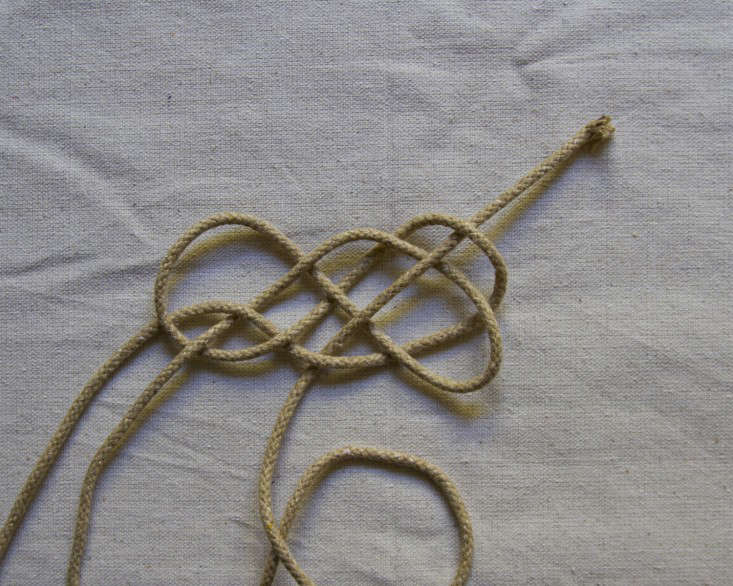
Above: Draw the length of rope back through the knot, repeating the over/under pattern shown above.

Above: When making your model mat, use the palm of your hand to hold the rope in place as you pull the rope though the knot. When you make your full-sized version, I strongly encourage luring a partner into the project so that one of you can hold the knot in place, and the other can pull the length of rope through. (I tried this first as a solo endeavor and wound up with a wonky mat that had to be unknotted. If you think knotting 100 feet of rope is arduous, believe me when I say that you will not want to unknot it.)

Above: The next loop completes the pattern. Loop your length of rope back around and weave it through again, along the original x to make the final right-hand loop, seen in process above.
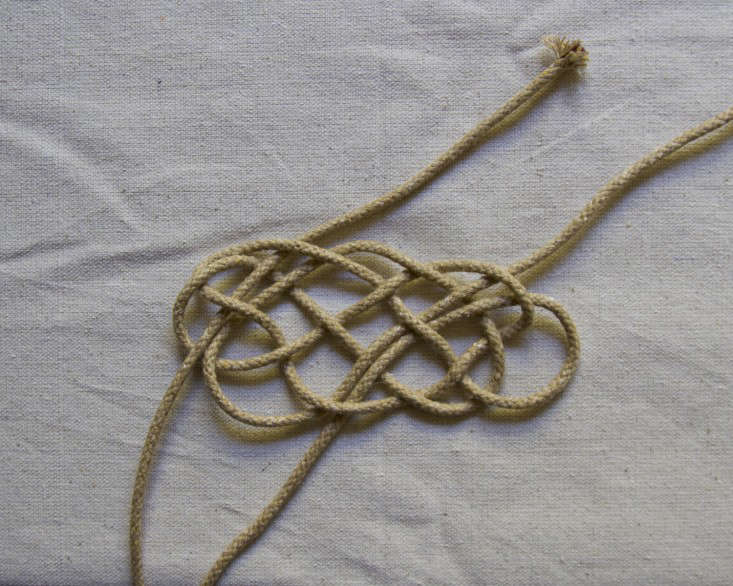
Above: At this stage, you have your complete pattern and all that’s left to do is continue to weave along these original lines, following the same over/under pattern of the original knot. If you’d like to see every stage of the knot, head to the ever-helpful Animated Knots for a full animation.

Above: As you weave, remember to continuously adjust your knot so that it remains straight and symmetrical. This is especially important on the full-size version.

Above: Keep your rope as flat as possible throughout; rope that criss-crosses where it shouldn’t will cause problems down the line.

Above: The knot after being wrapped three times.

Above: The completed knot. To finish off the mat, tuck in the ends and get out a hot glue gun to secure them in place. If you decide to use nylon rope, you can achieve the same effect by melting the ends of the rope to the underside of the mat.

Above: After I finished weaving with the full-sized rope, I gently tucked in any rows that had popped up, so each layer of the knot lay as flat as possible.

Above: If when you’re all finished, you politely point guests to your neighbors’ mat for actual foot-wiping, you’ll be forgiven. That’s certainly what I’ll be doing.
For more small space DIYs, see Dalilah’s Rolling Rack for Shoes and Erin’s Tiny Fall Garden in a Window Box.
(K)not up to the challenge? See 10 Easy Pieces: Durable Doormats. Want to create an instant mudroom in your entryway? See 10 Easy Pieces: Sturdy Mudroom Hooks.


Have a Question or Comment About This Post?
Join the conversation