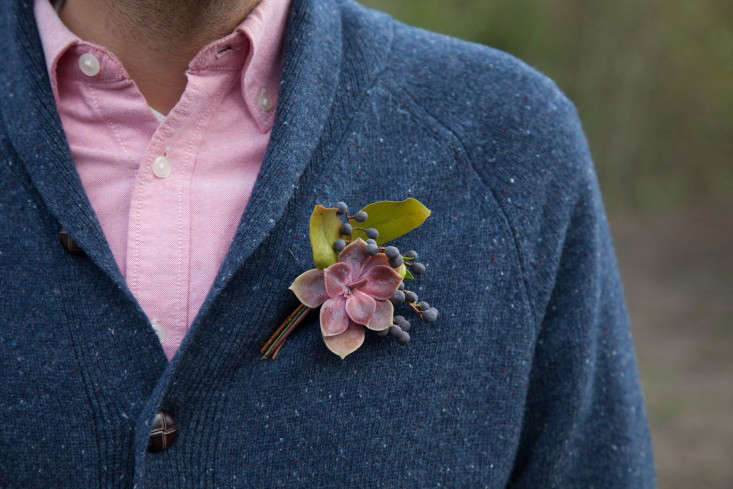
Flowers for men? Why ever not. Boutonnií¨res, like this one designed by Farmgirl Flowers’ Rhiannon Smith, can have a rakish, unstudied appeal. Cheaper than a necktie, and more fun, this small yet sweet token of your affection would make a charming Valentine’s Day gift.
Photographs by Brian Hildebrand.
Above: Gather your supplies, all easily procured at the craft store.
Succulent Boutonnií¨re by Rhiannon Smith (see more of her work at Rhiannon Flowers).
Materials:
- 10 inches of 22 gauge floral wire
- 14 inches of floral tape
- 2-3 inches of ¼ inch thick ribbon (optional)
- For your flowers and greens, go foraging. “If you’re going out and foraging materials yourself, it makes it more personal,” says Smith. “It’s fun to go in your backyard and find something you can use. Men really like unexpected materials.”
- You’ll need a larger, round flower as a focal point, a sprig of berries or rosehips, and a leaf. For this boutonnií¨re, Smith used a rosette from a succulent as the focal point, a bit of privet berry, which grows all around San Francisco, and a pistachio leaf. But you can also use baby pomegranate, or a round ranunculus flower as your focal point. Rosehips or tiny flowerbuds could be used in place of the berries. Any leaf that catches your eye will do.
Instructions:
- Create a stem for your succulent rosette. Take 6 inches of floral wire, and pierce the rosette through its center, up through the base, towards its showy face, leaving about 3 inches of wire below the base.
- Come back down through the rosette, close to where you originally pierced it, forming a “U” with the wire.
- With 7 inches of floral tape, wrap the pair of wires from the base of the flower down towards the stem.
- Trim the ends so the stem is about 2 inches long, or longer, to balance out the arrangement.
- Gather your foraged finds into a pleasing arrangement with the rosette in front, and wind a 4-inch length of floral wire around the stems to secure.
- With another length of floral tape, cover the stems and wire, and trim the excess to about 2 inches, or whatever length looks best.
- If you’re using a bit of ribbon, there’s no need to tie a bow. Smith uses a simple square knot.
- Finally, present your gift to the person in question, and blush.
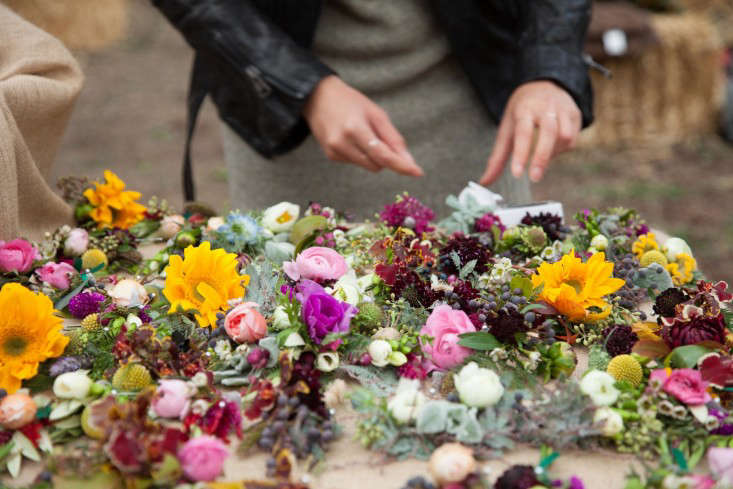
Above: An array of boutonnií¨res made for a Farmgirl fíªte. Sunflower was involved, as well as ranunculus, craspedia, dusty miller, privet berry, eucalyptus and olive leaf.
Feeling romantic? Browse the rest of our Valentine’s Day Ideas.
Hoping for a Valentine’s Day sans red roses? See DIY: Winter Romance in a Silver Brunia Bouquet
Utterly stumped? See Joel Stein’s Tips for Buying Valentine’s Flowers


Have a Question or Comment About This Post?
Join the conversation