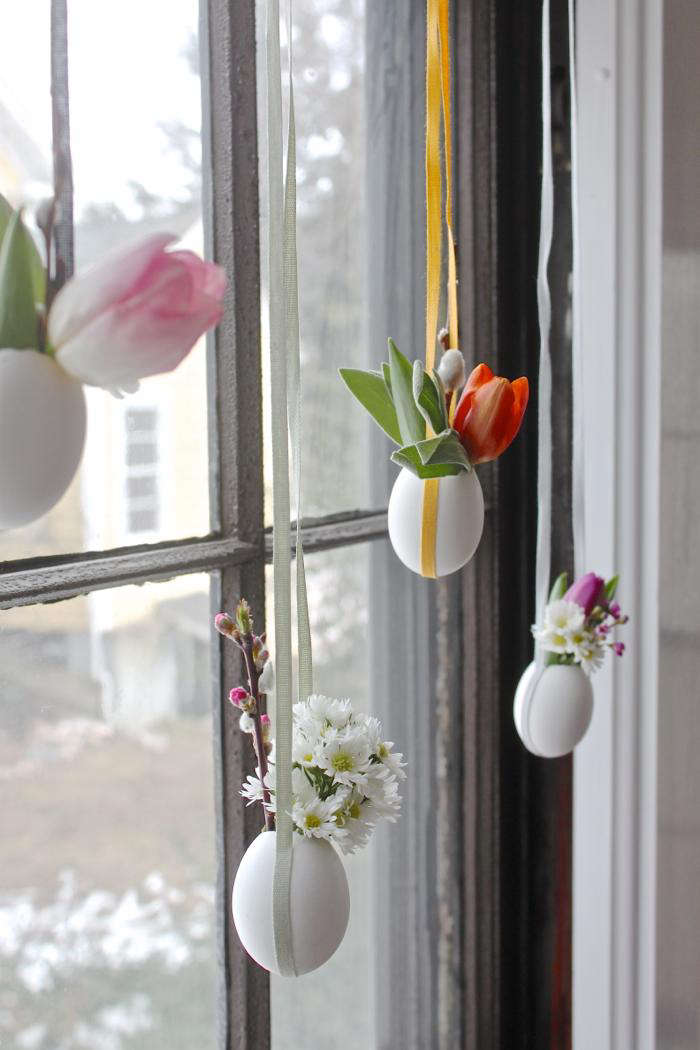
In celebration of that time of year when one gets to indulge with abandon in bunnies, chicks, and all things “cute, pretty, and pastel,” my children and I have been creating myriad Easter projects. But this is one I did all on my own when they were at school: delicate, tiny Easter posies hanging from the window, a welcoming homage to spring.
Photography by Justine Hand.
Above: Since your egg vases are fairly small, check them daily for water.

Above: A completed posy in its little egg vase awaits a sunny spot in the window.
Materials:

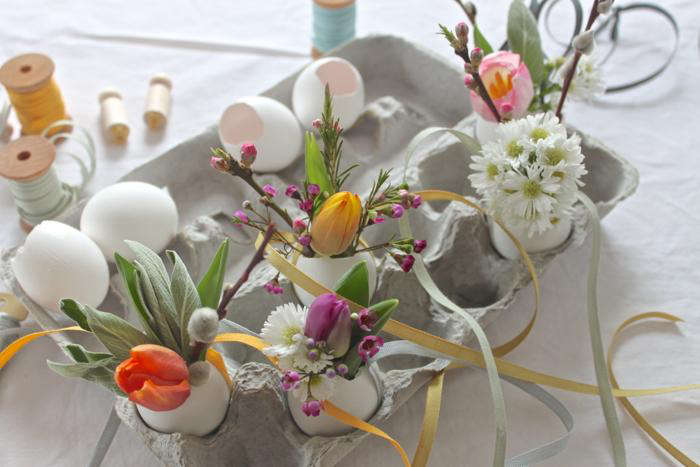
Above: For this project all you need is: ribbon, flowers, scissors, glue, and some cleaned eggs shells with the tops taken off (like a soft boiled egg.) We collected our eggs over several breakfasts. Don’t worry about creating even edges; the flowers will hide them.
Step-by-Step Instructions:

Above: I selected Studio Carta’s 2/8″ Width Cotton Ribbon in sophisticated hues, such as this “iron” spool pictured here. I also chose: marigold, sage, pool, chartreuse, and ice at $9 each for five yards.
First, measure a length of ribbon from the top of your window to the height at which you want to hang the egg vases. Double this length and cut. I found it best to stagger lengths slightly.
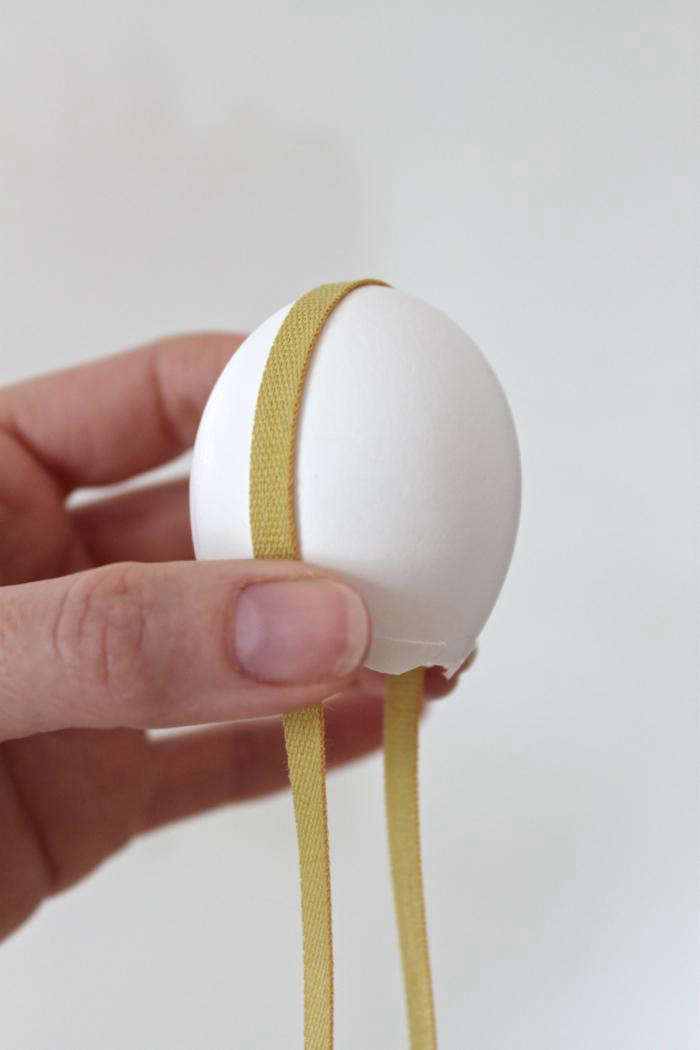
Above: Place glue across the lengthwise circumference of the egg. Then place the middle of your ribbon at the bottom center of the egg and press down to glue along the sides.

Above: To make sure that the glue adheres to the sides, cross the ribbons over the top of each egg and let the eggs dry for several hours.

Above: Taking your flowers, assemble them into a small bouquet. Measure the stems against your egg to make sure that each bouquet sits right in your vase. (Ideally, this forager would have loved to use vernal garden flowers, such as crocus and narcissus. But springtime drags its feet here in New England, so I selected a mix of blooms, herbs, and branches from Whole Foods and Trader Joe’s.

Above: Place the posy in the egg and water it. I found that my soy sauce pitcher was perfect for this task.

Above: Repeat with other arrangements. Here I used pussy willow, an orange tulip, and sage.

Above: An aster, cherry blossom, and pussy willow arrangement sits next to my original pink tulip bouquet.
Above: My finished posies.

Abve: You could adapt this project and use similar egg vases (with shorter ribbons perhaps) to create a blooming centerpiece for your Easter table or even place them in egg cups to use as place card holders.

Above: Tie off the ends of your ribbons in a small bow and hang them with a tack (yes, it’s strong enough) in the window. (Now, if only that snow outside the window would melt!)
For more Easter floral arrangements, see:
- DIY: Forsythia for a Bright Easter Table.
- DIY: Hibiscus-Dyed Easter Eggs.
- DIY: Grow Your Own Wheat Grass Eggs.
- How to Make Natural Easter Egg Dyes.


Have a Question or Comment About This Post?
Join the conversation