Every couple of months or so, my dear friend Angela Liguori and I take a break from our routines to collaborate on a creative project. We always use Angela’s Italian-imported, US-designed, Studio Carta ribbon. Other than that, we go where our imaginations and the season take us.
Past projects have included a sweet posy with mini daisies or a keepsake book. This spring we opted for a whimsical and romantic floral garland.
Photography by Justine Hand.

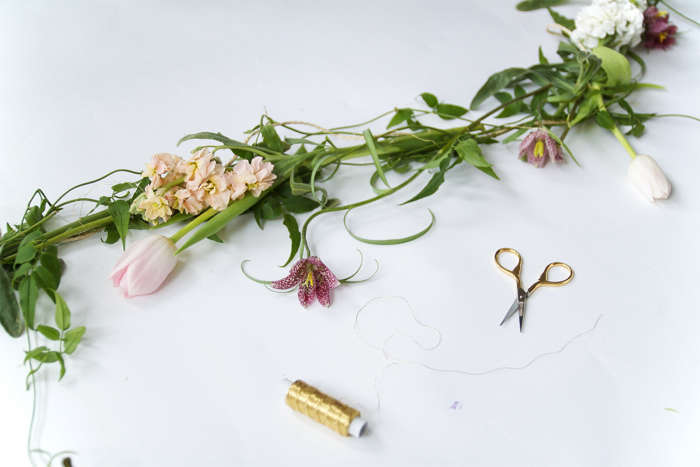
Above: For this garland, you’ll need some type of vine, plus long-stemmed flowers of your choice. As this loosely structured bough does not use any floral foam, be sure to pick blooms that won’t immediately wilt.
We opted for jasmine vines, bell-like fritillaria, pink tulips, and a cluster flower we found at Trader Joe’s. Tip: The length of your garland will determine how many blooms you need.

Above: With a wedding or shower in mind, we chose a pastel assortment of Studio Carta wide loose and tight weave ribbon in natural cotton and wide metallic loose weave. By using different ribbons and flowers, this garland can be adapted to fit any palette.
Other supplies include thick twine, scissors, and something with which to secure the flowers to the twine. We used Studio Carta’s soon-to-be released gold embroidery thread (below), because we liked the subtle shine. You could also use floral wire.

Step 1: Cut the twine to the desired length. Then loosely wind the vine around the twine. For a more graceful and romantic quality, drape the ends of your vine.

Step 2: Begin to work in the flowers. As with the vines, we let some of the blooms drape beneath the garland.
Step 3: After the flowers are in place, secure them with thread or wire.

Above: Continue to add as many flowers as you want.

Step 4: Cut your ribbons to approximately the same length. Then using one at a time, loosely wrap them around the garland. Rather they tying ours, we secured the ribbons by weaving them in and out of the greens.

Above: Angela and I chose a loose, informal drape for our ribbon, so that it complemented the sweeping flowers.
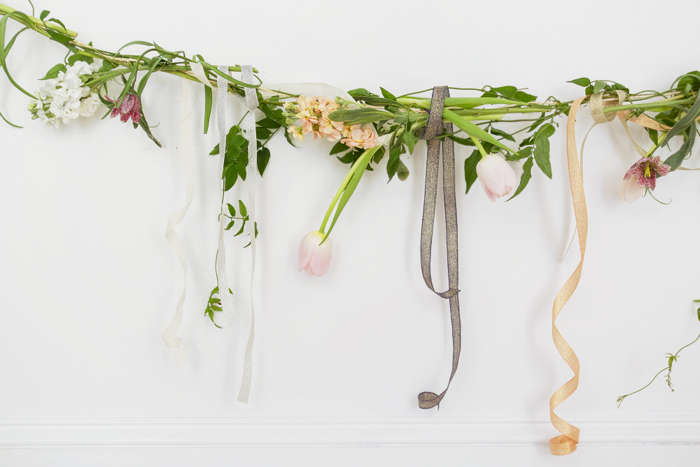
Above: A section of the finished garland draped in a simple arch on a white wall in Angela’s studio. You could also hang it from the ceiling or, for a centerpiece, lay it down the length of a table.

Above: Hung on a chalk wall, our garland was even more dramatic against the black.

Above: We finished one end of garland with curling jasmine vines, peach loose weave ribbon, and a single tulip.

Above: A detail of the frittilaria.
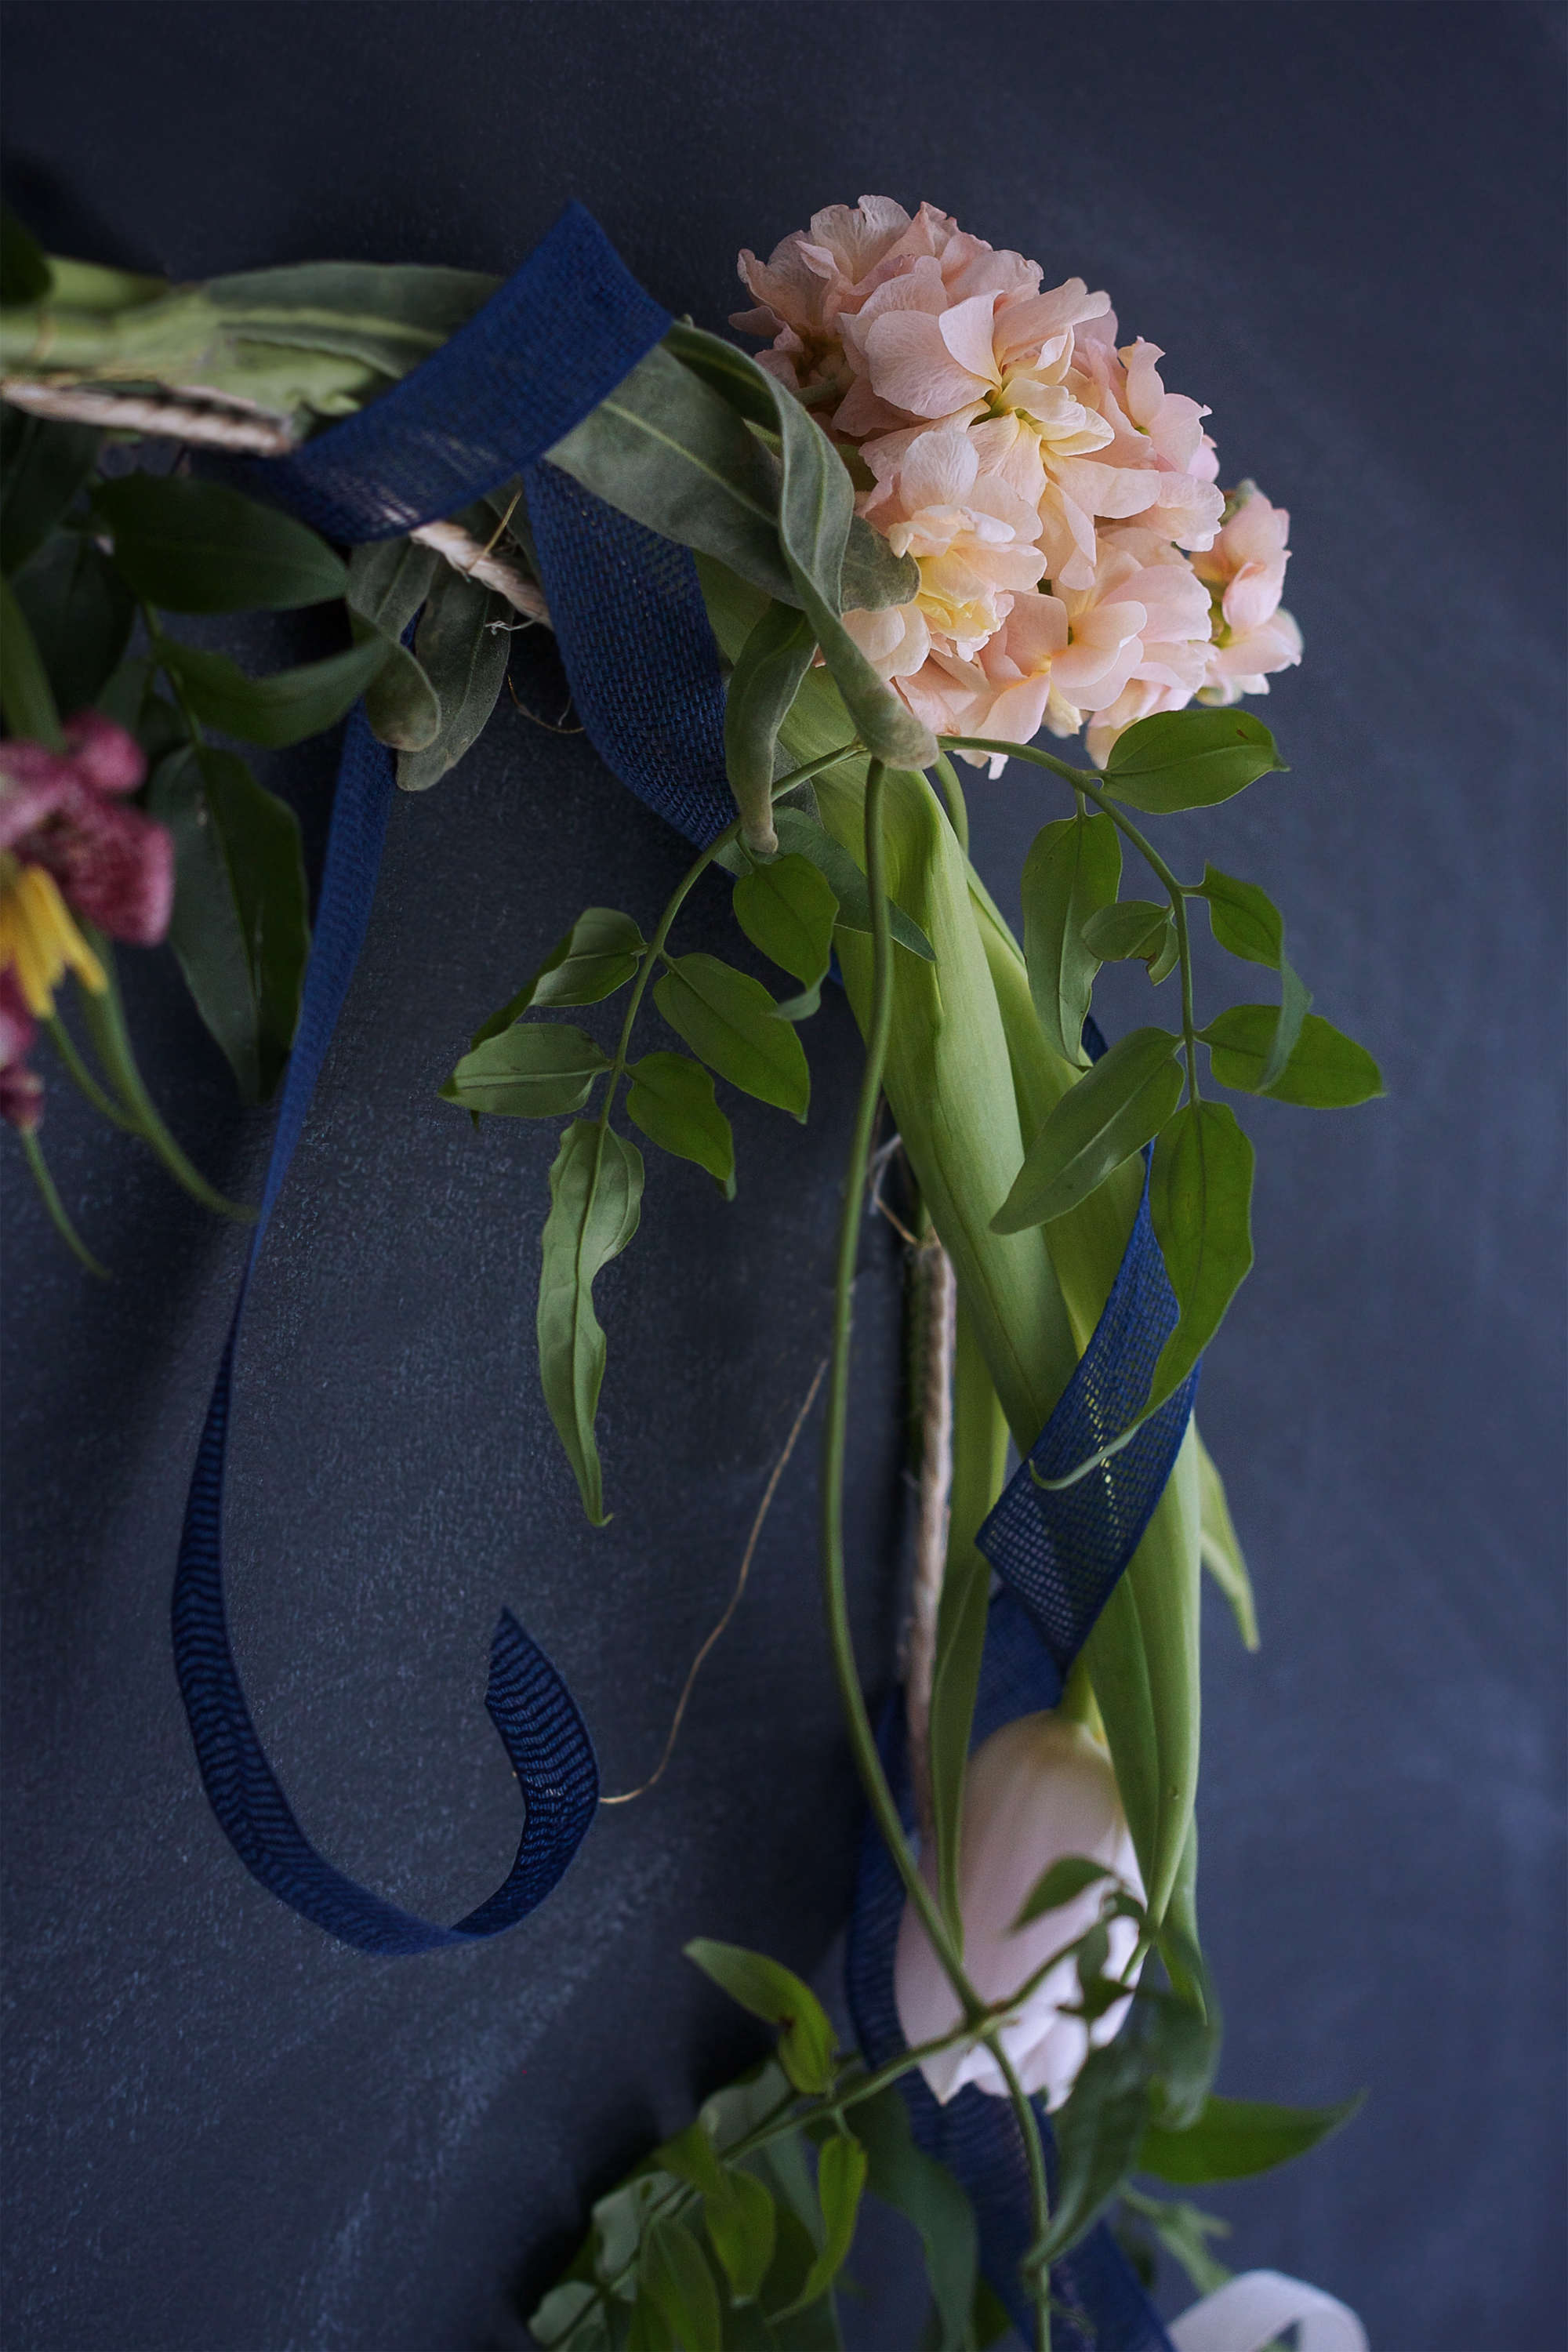
Above: At this end we used a palette of navy and peach.

Above: Hanging the garland vertically produced a fanciful cascade.
For more of our favorite wedding flowers, see Bride on a Budget: DIY Wedding Flowers for $20 and Tara Getting Married: Grow Your Own Wedding Flowers.


Have a Question or Comment About This Post?
Join the conversation