I am not going to lie. Making this beautiful burlap DIY Christmas tree skirt involves sewing. But don’t be scared. I came up with an easy, no-fail, you-will-fall-in-love-with-sewing pattern.
The inspiration? My garden. After using burlap to wrap our hydrangea bushes for the winter, I found myself with a bit of leftover fabric–raw and utilitarian, but with clean edges. Paired with crisp cotton, burlap becomes a tree skirt that is beautiful in its simplicity, and it’s a perfect canvas to pile with packages.
Photography by Sarah Waldo Jagger for Gardenista.

Above: So dust off that sewing machine, crank up some James Taylor Christmas carols for background music, and settle in for a craftsy afternoon. This tree skirt comes together quickly, even for a rusty beginner, and is destined to become a family heirloom.
Read on for a materials list and step-by-step instructions:

Materials
- Burlap fabric, 44 inches by 44 inches
- White cotton, 44 inches by 44 inches
- Cotton twill tape (1 inch wide), 90 inches cut into six 15-inch pieces
- Straight pins
- Sharp scissors
- Ruler
Step 1: Start with your burlap and cotton both cut in pieces 44 by 44 inches square. Iron each for more precise folding and cutting. Fold each piece in half and then in half again. You will now have two 22-by-22-inch square folded pieces.

Step 2: From a folded corner, measure out 22 inches in the shape of an arch, as shown above. Repeat for both of the folded pieces. Cut along your arch. From the folded corner, measure another 2″ arch, as shown. Cut that as well.

Step 3: Unfold your two pieces (they should look like doughnuts). Cut a straight line into the doughnut from outer edge into the center hole. Repeat for the other piece.
Step 4: Lay the pieces flat, one on top of the other, slits lined up, right sides of the fabric together (when using burlap and single color cotton, this isn’t as critical as if you were using a velvet or printed fabric for one or both of the tress skirt sides). If the outer edges are not perfectly matched, not to worry–average the difference and trim. Pin around the center hole. Place a few pins scattered around the “body” of the doughnut.
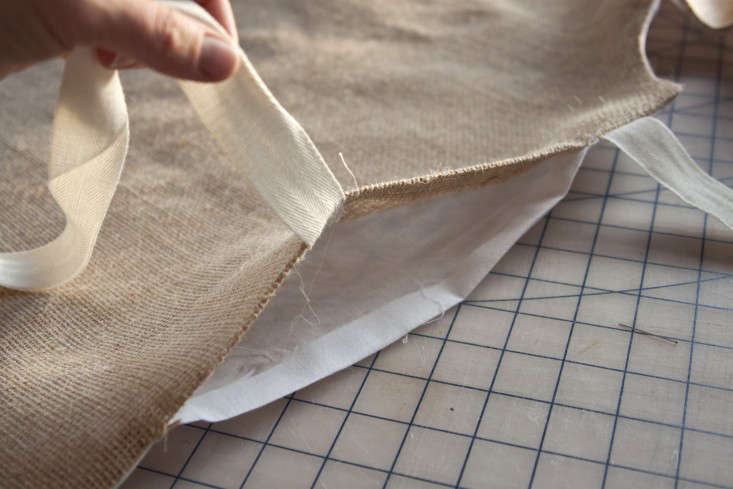
Step 5: Fold up the top piece of fabric, away from each edge of the slit. On the bottom piece of fabric, measure the slit from top to bottom. Find the center and place one of your twill tape (or ribbon) pieces at this point, on each side of the slit. One edge of the twill tape should be lined up with the slit edge and the ribbon should be laid INTO the skirt (see above). Pin in place. Repeat two more times, on either side of the slit, approximately 1.5 inches from the center and 1.5 inches from the outer edge. Unfold the top piece of fabric back down over the twill tape ties.
Step 6: With the twill tape sandwiched between the two layers of fabric, pin down both sides of the slit and around the outer edge. Take care to pin with the fabric laid out as smoothly as possible.
Step 7: With ½-inch seam allowance, start sewing from just below the top twill tape tie on one side of the slit. Sew up to the center, stopping ½ inch before the edge. Turn and sew around the center hole, stopping and turning ½ inch before the edge. Sew down that side of the slit, passing over the three ties on that side. Stop and turn ½ inch before the bottom edge. Sew around the entire bottom edge, stopping to turn ½ inch before you reach the slit. Turn and sew up just past the bottom tie. This should leave you with several inches un-sewn along one side of the slit. Separate the two pieces of fabric to access the center tie, which should be pinned in place. Sew this tie down.

Step 8: Remove all the pins. Cut V-shaped notches from the center and trim your corners off diagonally (as shown above). Get as close as you can to the stitches but take care not to snip into your sewing! Along the outer edge, clip in towards the seam every inch or so, again, take care not to snip into your seam. This step will ensure your curved edges look professional when ironed.
Step 9: Through the un-sewn edge, turn your skirt right side out. Use a pointy object (like a pencil) to push out the corners. Iron so the center hole edges are flat and smooth. Iron down the sewn slit side and around the outer edge of the skirt. When you reach the un-sewn section, turn both pieces of fabric in ½ inch (see photo). Press. Using a ¼-inch seam allowance, topstitch over this opening. Press your twill tape ties if they need it.
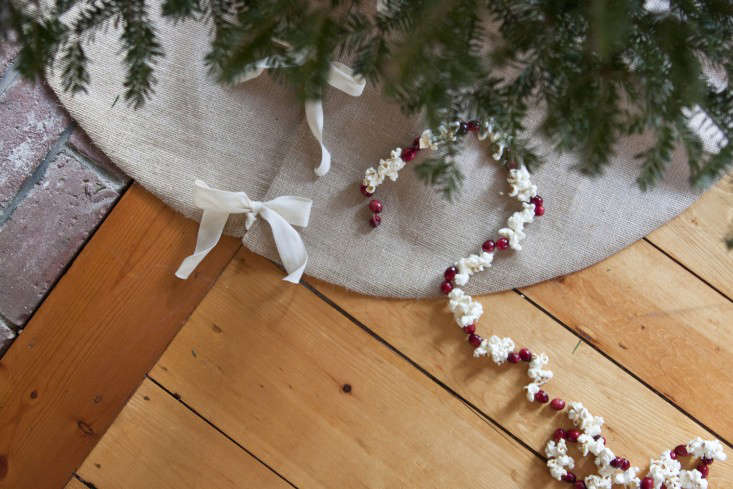
Step 10: Place your finished skirt around your tree and tie.
Decorating a Christmas tree? For more inspiration, see:
- DIY: Snowballs for the Christmas Tree
- Playing with Fire: Clip-on Candle Holders
- DIY: Tiny Trees for a Christmas Window Box


Have a Question or Comment About This Post?
Join the conversation