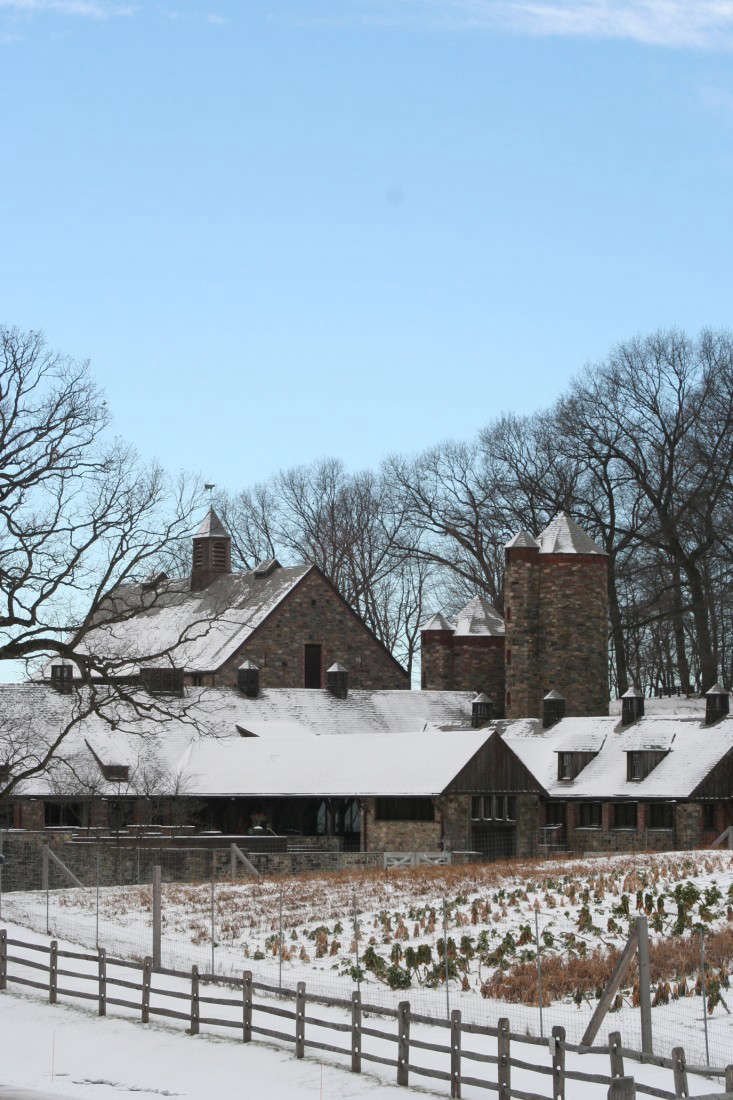
Before diving headlong into the world of blogging, I was lucky enough to enjoy a stint working in the fresh air as public programs manager at Stone Barns Center for Food and Agriculture in Pocantico Hills, New York. Even though I’m no longer making the daily trek up to the 80-acre farm just north of New York City, it’s still the first place I think of when anyone mentions wintertime growing.
There’s no season that’s not busy at Stone Barns, a nonprofit organization on a mission to change the way America eats and farms. Even in the depths of winter there are greenhouses to maintain and hardy greens to harvest from hoop houses–to say nothing of snow to clear and fences to repair. Four season farm director, Jack Algiere, took a few minutes’ break from the cold to share his top tips for wintertime growing.
Photographs from Stone Barns Center.
1. Think of winter in summer.
You may be wiping your brow and fawning over tomatoes while working in your summer garden, but focus part of your mind on the seasons to come. It’s important to think of your garden as a yearlong plan, not separate season plans. The easiest way to do this is to consider the succession of your crops. Are your tomatoes finished in October? That may be too late to plant some fall or winter crops. But it’s the perfect time to plant a cover crop like winter rye. Your pea plants are through in July? This is when you can plant many of your winter storage crops. Have a bed opening up in September? Get your winter lettuces, mustards and spinach in then.
2. Stock your soil.
 Just as you may stock your pantry with seasonal dry goods, think about stocking your soil crops to eat through the winter. In July and early August plant carrots, beets, cauliflower, kohlrabi, and celery root. Winter lettuces, mustards and hearty greens can be planted into September and October.
3. It’s all in the timing.
 The lack of light and radiance after the fall equinox (September 21) extends the maturation period of plants. All seed packs list “days to maturity” as an indication of when a crop will be ready to harvest. However, these estimations are based on spring light–when the days get longer. So if you plant a seed listed as 30 days to maturity after the equinox–when the days get shorter–you might see as much as a doubling in the days to readiness. Allow plenty of time for crops to mature to full size.
4. Be choosy.
Not all kale is created equal. Even within plant varieties, there are some more suited for winter growing. Choose the heartiest plants. For example, Russian varieties of kale withstand the cold far better that Italian varieties. (See Laura’s Gone Wild: How to Grow Vegetables in the Middle of Nowhere for more hardy varieties.)
5. Cover up.
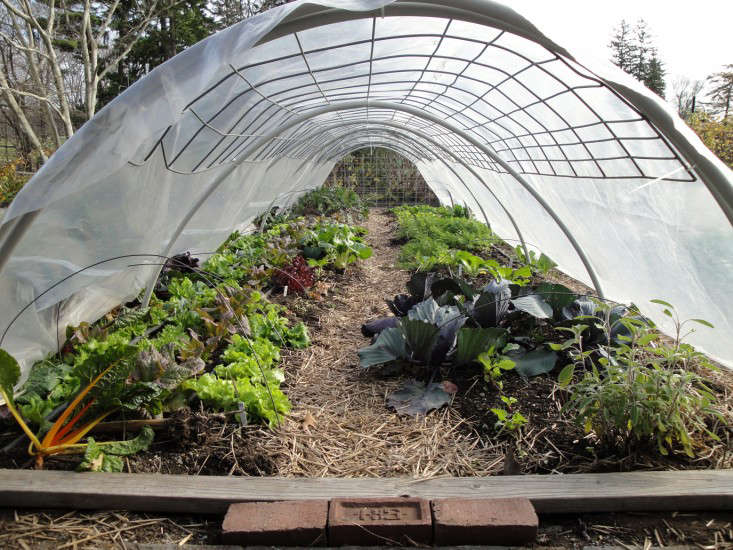 Hearty crops like spinach can be grown over the winter with the added protection of low tunnels you can make out of hardware-found conduit pipe and polyethylene film covers. (Not sure what a low tunnel is? Stone Barns Center explains, here.) If you’re growing kale, mache and carrots through the cold season, you will want to add a second layer of protection, building a higher tunnel over the low tunnel.
6. Plant for your table.
 When planning, try to estimate your winter consumption. Think about how much per week you’d like to eat from your garden. How many pounds of beets or carrots? One squash or four? Look for varieties that will produce what you need and plant accordingly.
7. Pick when perfect.
It’s better to harvest crops at their peak and store them in that state, when they are beautiful and ripe, rather than risk rot or flowering in the soil. This may not happen all at once for one crop, you may find half your carrots are ready to go while the other half needs some more time. But you’ll want beets and carrots out before the first hard frost, and cauliflower and cabbage out in December.
8. Go to the “store.”
 After harvests of your storage crops, store them! All you need for storage is a cool, dark place. Basements work well, so do coolers. The hope is to discourage further growth and create a stable environment that’s not too hot or too cold. Ideal temperatures are between 55 and 45 degrees Fahrenheit. Crops like cauliflower, kohlrabi, celery root and cabbages do best in plastic bags inside refrigerators. Potatoes, beets and carrots can be kept in crates packed with soil or sand.
And more than anything else? Plant what you love.

Eager to see the farm in winter for yourself? Stone Barns Center is open to the public year-round: 10:00 am to 5:00 pm, Wednesday to Sunday.
Need to know how to store your winter harvest? See 5 Favorites: Modern Root Cellars and Roots in the Sand: Winter Vegetable Storage.


Have a Question or Comment About This Post?
Join the conversation